


45
1
Camera Basics
2
Auto Mode /
Hybrid Auto Mode
3
Other Shooting Modes
4
P Mode
5
Tv, Av, M, and C Mode
6
Playback Mode
7
Wi-Fi Functions
8
Setting Menu
9
Accessories
10
Appendix
Index
Before Use
Basic Guide
Advanced Guide
5
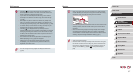
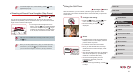
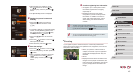
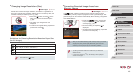
Continue registering face information.
zTo register up to 4 more points of face
information (expressions or angles),
repeat step 2.
zRegistered faces are more easily
recognized if you add a variety of face
information. In addition to a head-on
angle, add a slight side angle, a shot
when smiling, and shots inside and
outside.
● The ash will not re when following step 2.
● If you do not register a birthday in step 3, Babies or Children icons
(
=
38) will not be displayed in [ ] mode.
● You can overwrite registered face info, and add face info later if
you have not lled all 5 face info slots (
=
44).
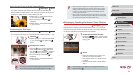
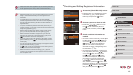
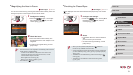
Shooting
If you register a person ahead of time, the camera will prioritize that
person as the main subject, and optimize focus, brightness, and color for
that person when shooting.
zWhen you point the camera toward a
subject, the names of up to 3 registered
people will be displayed when they are
detected.
zShoot.
zDisplayed names will be recorded in still
images. Even if people are detected, but
their names are not displayed, the names
(up to 5 people) will be recorded in the
image.
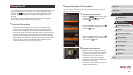
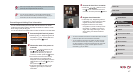
zAfter [Register?] is displayed, press
the [ ][ ] buttons or turn the [ ] dial
to choose [OK], and then press the [ ]
button.
zThe [Edit Prole] screen is displayed.
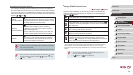
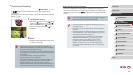
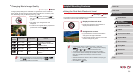
3
Register the person’s name and
birthday.
zPress the [ ] button to access the
keyboard, and then enter the name
(
=
32).
zTo register a birthday, on the [Edit Prole]
screen, choose [Birthday] (either press
the [
][ ] buttons or turn the [ ] dial),
and then press the [ ] button.
zPress the [
][ ] buttons to choose an
option.
zPress the [
][ ] buttons or turn the [ ]
dial to specify the date.
zWhen nished, press the [
] button.
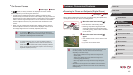
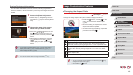
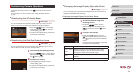
4
Save the settings.
zPress the [ ][ ] buttons or turn the [ ]
dial to choose [Save], and then press the
[ ] button.
zAfter a message is displayed, press the
[
][ ] buttons or turn the [ ] dial to
choose [Yes], and then press the [ ]
button.