


57
Basic Setups for the Switcher
Chapter 3 Preparations
lower string (NEXT select button) indicates the next program output video
(lights in orange).
When the lever is in the lower end position, the button of the lower string
(NEXT select button) indicates the current program output video (lights in red),
and the button of the upper string (PGM select button) indicates the next
program output video (lights in orange).
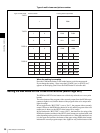
The menu is used to select bus toggle or bus fixed mode.
1
Display menu page 943.
For the procedure for displaying the menu, see “Menu Operation” on page
46.
2
Turn the F4 control to display “On” or “Off” under “BUS TGL.”
On: to use the cross-point buttons in bus toggle mode
Off: to use the cross-point buttons in bus fixed mode
When the setting is complete
Press the CAM mode button or SW mode button to exit menu mode.
If you change the setting, “Save setup data? [PAGE] (yes) or [EXIT] (no)”
appears on the display panel. Press the PAGE button to store the data.
Setting Up the VISCA Camera
To set the VISCA communication mode (menu page 911)
The menu is used to select VISCA mode for communication with the VISCA
cameras, RS-422 or RS-232C.
1
Display menu page 911.
For the procedure for displaying the menu, see “Menu Operation” on page
46.
2
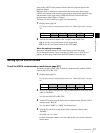
Turn the F1 control to display the VISCA communication mode to be used
under “CONTROL.”
You can select RS-422 or RS-232C.
3
Turn the F2 control to set the baud rate for communication with the VISCA
cameras under “BAUD.”
You can select “9600” or “38400” for the baud rate.
4
Turn the F3 control to set the model of the connected cameras under
“MODEL.”
Normally, set it to “Auto.”
If all the connected cameras are of the same model, you can also select the
model name.
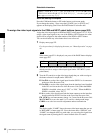
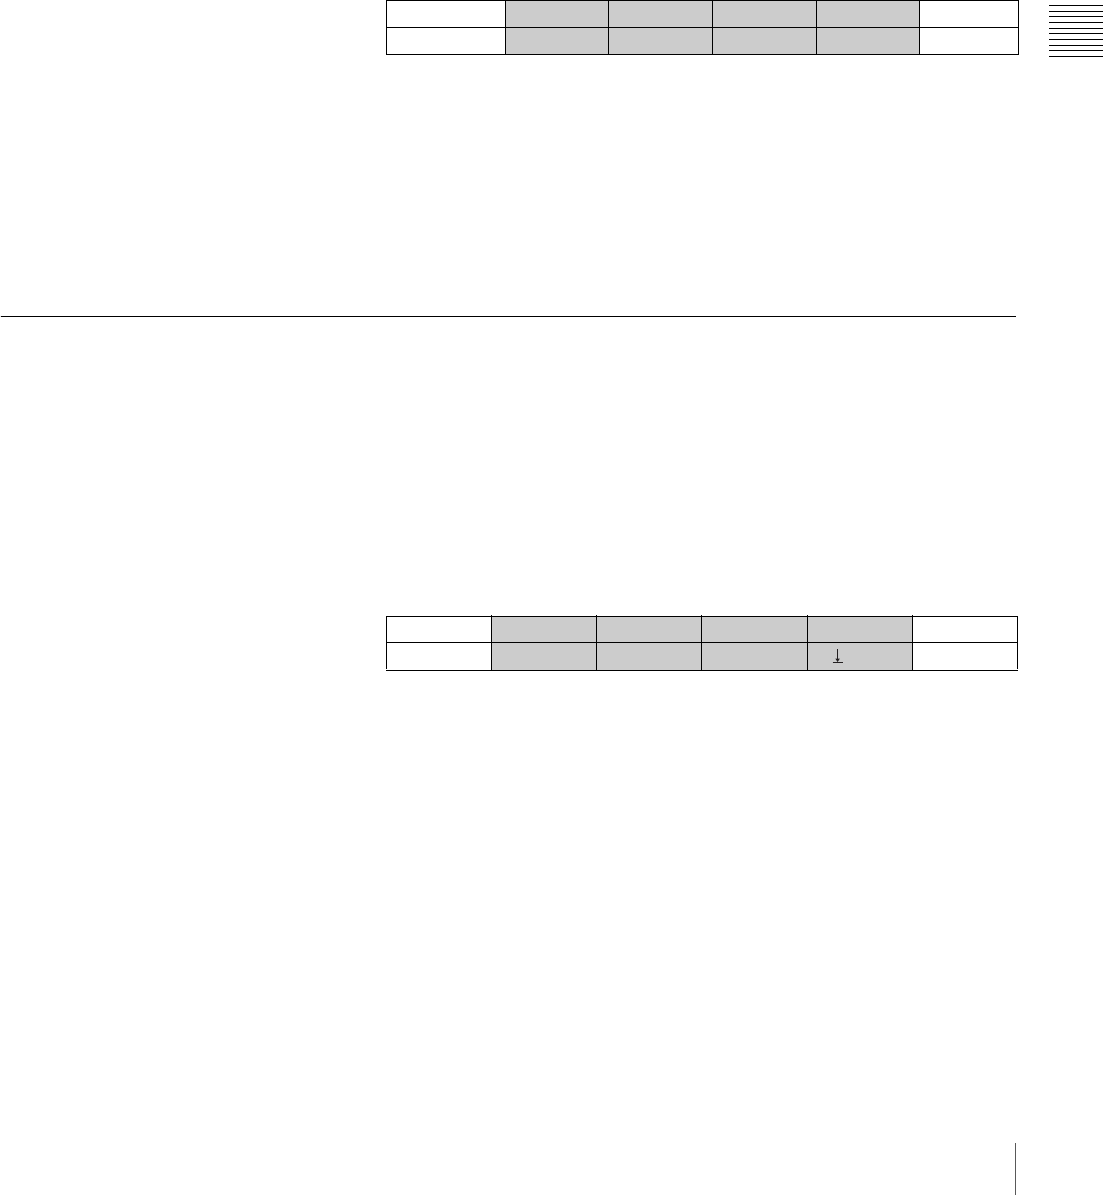
PANEL ME AUTO DSK AUTO PIP AUTO BUS TGL 3/5
TRANS
30 30 30 Off 943
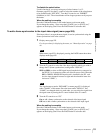
CAMERA CONTROL BAUD MODEL APPLY 1/8
VISCA
RS-232C 9600 Auto
Exec
911