


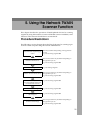


Sending Scan File by E-mail
126
6
Before Sending Scan Data
Reference
See p.109 “Setting Originals” for
information about how to place the
originals in the ADF (Auto Docu-
ment Feeder) or on the exposure
glass, and about available paper
size and weight.
Original Location
When you perform a Send Scan (e-
mail, Send File (SMB/FTP) or Deliv-
ery Server) operation, it is not neces-
sary to select the location (ADF or
exposure glass) for scanning.
This machine automatically detects
the originals placed in the ADF or on
the exposure glass, and scan is per-
formed. Note, however, that the orig-
inals in the ADF are scanned when
the originals are set to on both of the
ADF and the exposure glass.
Original Orientation and
Scanning Sides
When you perform a Send Scan (e-
mail, Send File (SMB/FTP) or Deliv-
ery Server) operation, you can specify
the original orientation and scanning
sides manually, by pressing [Scan] on
the E-mail/Send File standby screen,
and then selecting [Manual]. Instead of
manually specifying these settings,
you can also use the settings you have
registered to “ Default ”, “ User 1”, “
User 2”, or “ User 3”. See p.132 “Mak-
ing Scan Settings” for details.
E-mail/Send File standby
screen
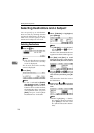
Before performing a Send Scan opera-
tion, make sure that the E-mail/Send
File standby screen is displayed on
the machine’s display panel.
The E-mail/Send File standby screen
is displayed as the Send Scan initial
screen when [7.Select Method] (in
[2.Send Scan Settings] under the Scan-
ner Features menu) is set to “ Send
File/TWAIN ”, while the Delivery
Server standby screen is displayed
when [7.Select Method] is set to “ Deliv-
ery Server/TWAIN ”.
• When the message “
Ready
” and
the number of copies are displayed
on the first line of the display pan-
el, the machine is standing by for
Print Scan. Press [PrevMenu] to re-
turn to the Select Method screen.