


G421-8600
QUICK INSTALLATION GUIDE
Image Scanner
Please read the Safety Information in the Operating Instructions before using this machine. It contains important information related to
USER SAFETY and PREVENTING MACHINE PROBLEMS.
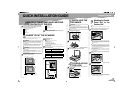
UNPACKING THE SCANER AND CHECKING
THE CONTENTS OF THE BOX
Check the contents of the box according to the follow-
ing list. If one some items are missing, please contact
your sales or service representative.
Quick Installation Guide(this sheet)
CD-ROM
USB Interface Card
USB Cable
Power Cord
Tools
Control Panel Unit
Screw
Safety Instruction Sheet
Card slot cover
Ferrite Core (Europe only)
Remove the plastic bag. Lift the scanner and move it to the
place where you want to install it.
WHERE TO PUT THE SCANNER
The Scanner's location should be carefully chosen because
environmental conditions greatly affect its performance.
WARNING
• Confirm that the wall outlet is near the machine and freely acces-
sible, so that in event of an emergency, it can be unplugged easily.
• Only connect the machine to the power source described on this sheet.
• Avoid multi-wiring.
• Do not damage, break or make any modifications to the power cord.
Do not place heavy object on it, pull it hard or bend it more than
necessary. These actions could cause an electric shock or fire.
CAUTION
• Keep the machine away from humidity and dust. A Fire or an electric
shock might occur.
• Place the machine on a strong and level surface. Otherwise, the
machine might fall and cause personal injury.
• If you use the machine in a confined space, confirm that there is a
continuous flow of air.
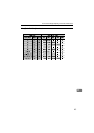
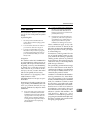
Optimum Environment Conditions
Recommended temperature and humidity
89.6 F
54%
80.6 F 80%50 F80%
89.6 F 15%
50 F 15%
%RH
80
60
40
20
50 70 8060 90
F
59 F
70%
59 F
30%
77 F
30%
77 F
70%
32 C
54%
27 C 80%10 C 80%
32 C 15%
10 C 15%
%RH
80
60
40
20
10 20 30
C
15 C
70%
15 C
30%
25 C
30%
25 C
70%
Possible operation range Recommended range
The machine must be level within 5 mm,0.2" both front to rear
and left to right.
TDLH140E
Environments to Avoid
Important
❒ Locations exposed to direct sunlight or strong light
❒ Dusty areas
❒ Areas with corrosive gases
❒ Areas excessively cold, hot, or humid
❒ Locations near an air conditioner or humidifier
❒ Locations near other electronic equipment
❒ Locations where the scanner might be subjected to frequent strong vibration
Power Connection
Connect the power cord to a power source with the following specifications:
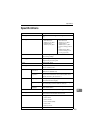
Product Specifications
North America
G421-17 power supply rating:
AC 120V, 60Hz, 2A
Europe/Asia
G421-27 power supply rating:
AC 220-240V, 50/60Hz, 1A
Electrical Outlet Requirements
North America
G421-17 Electrical Outlet Requirements:
AC 120V, 60Hz, min.10A
Europe/Asia
G421-27 Electrical Outlet Requirements:
AC 220-240V, 50/60Hz, min.5A
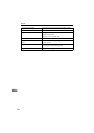
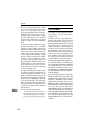
Space Required for Installing the Scanner
Leave enough space around the scanner. This space is necessary to operate
the scanner. The recommended(or minimum)space requirement is as follows.
ZDLH330
100mm
or more
660mm
or more
ZDLH340
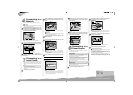
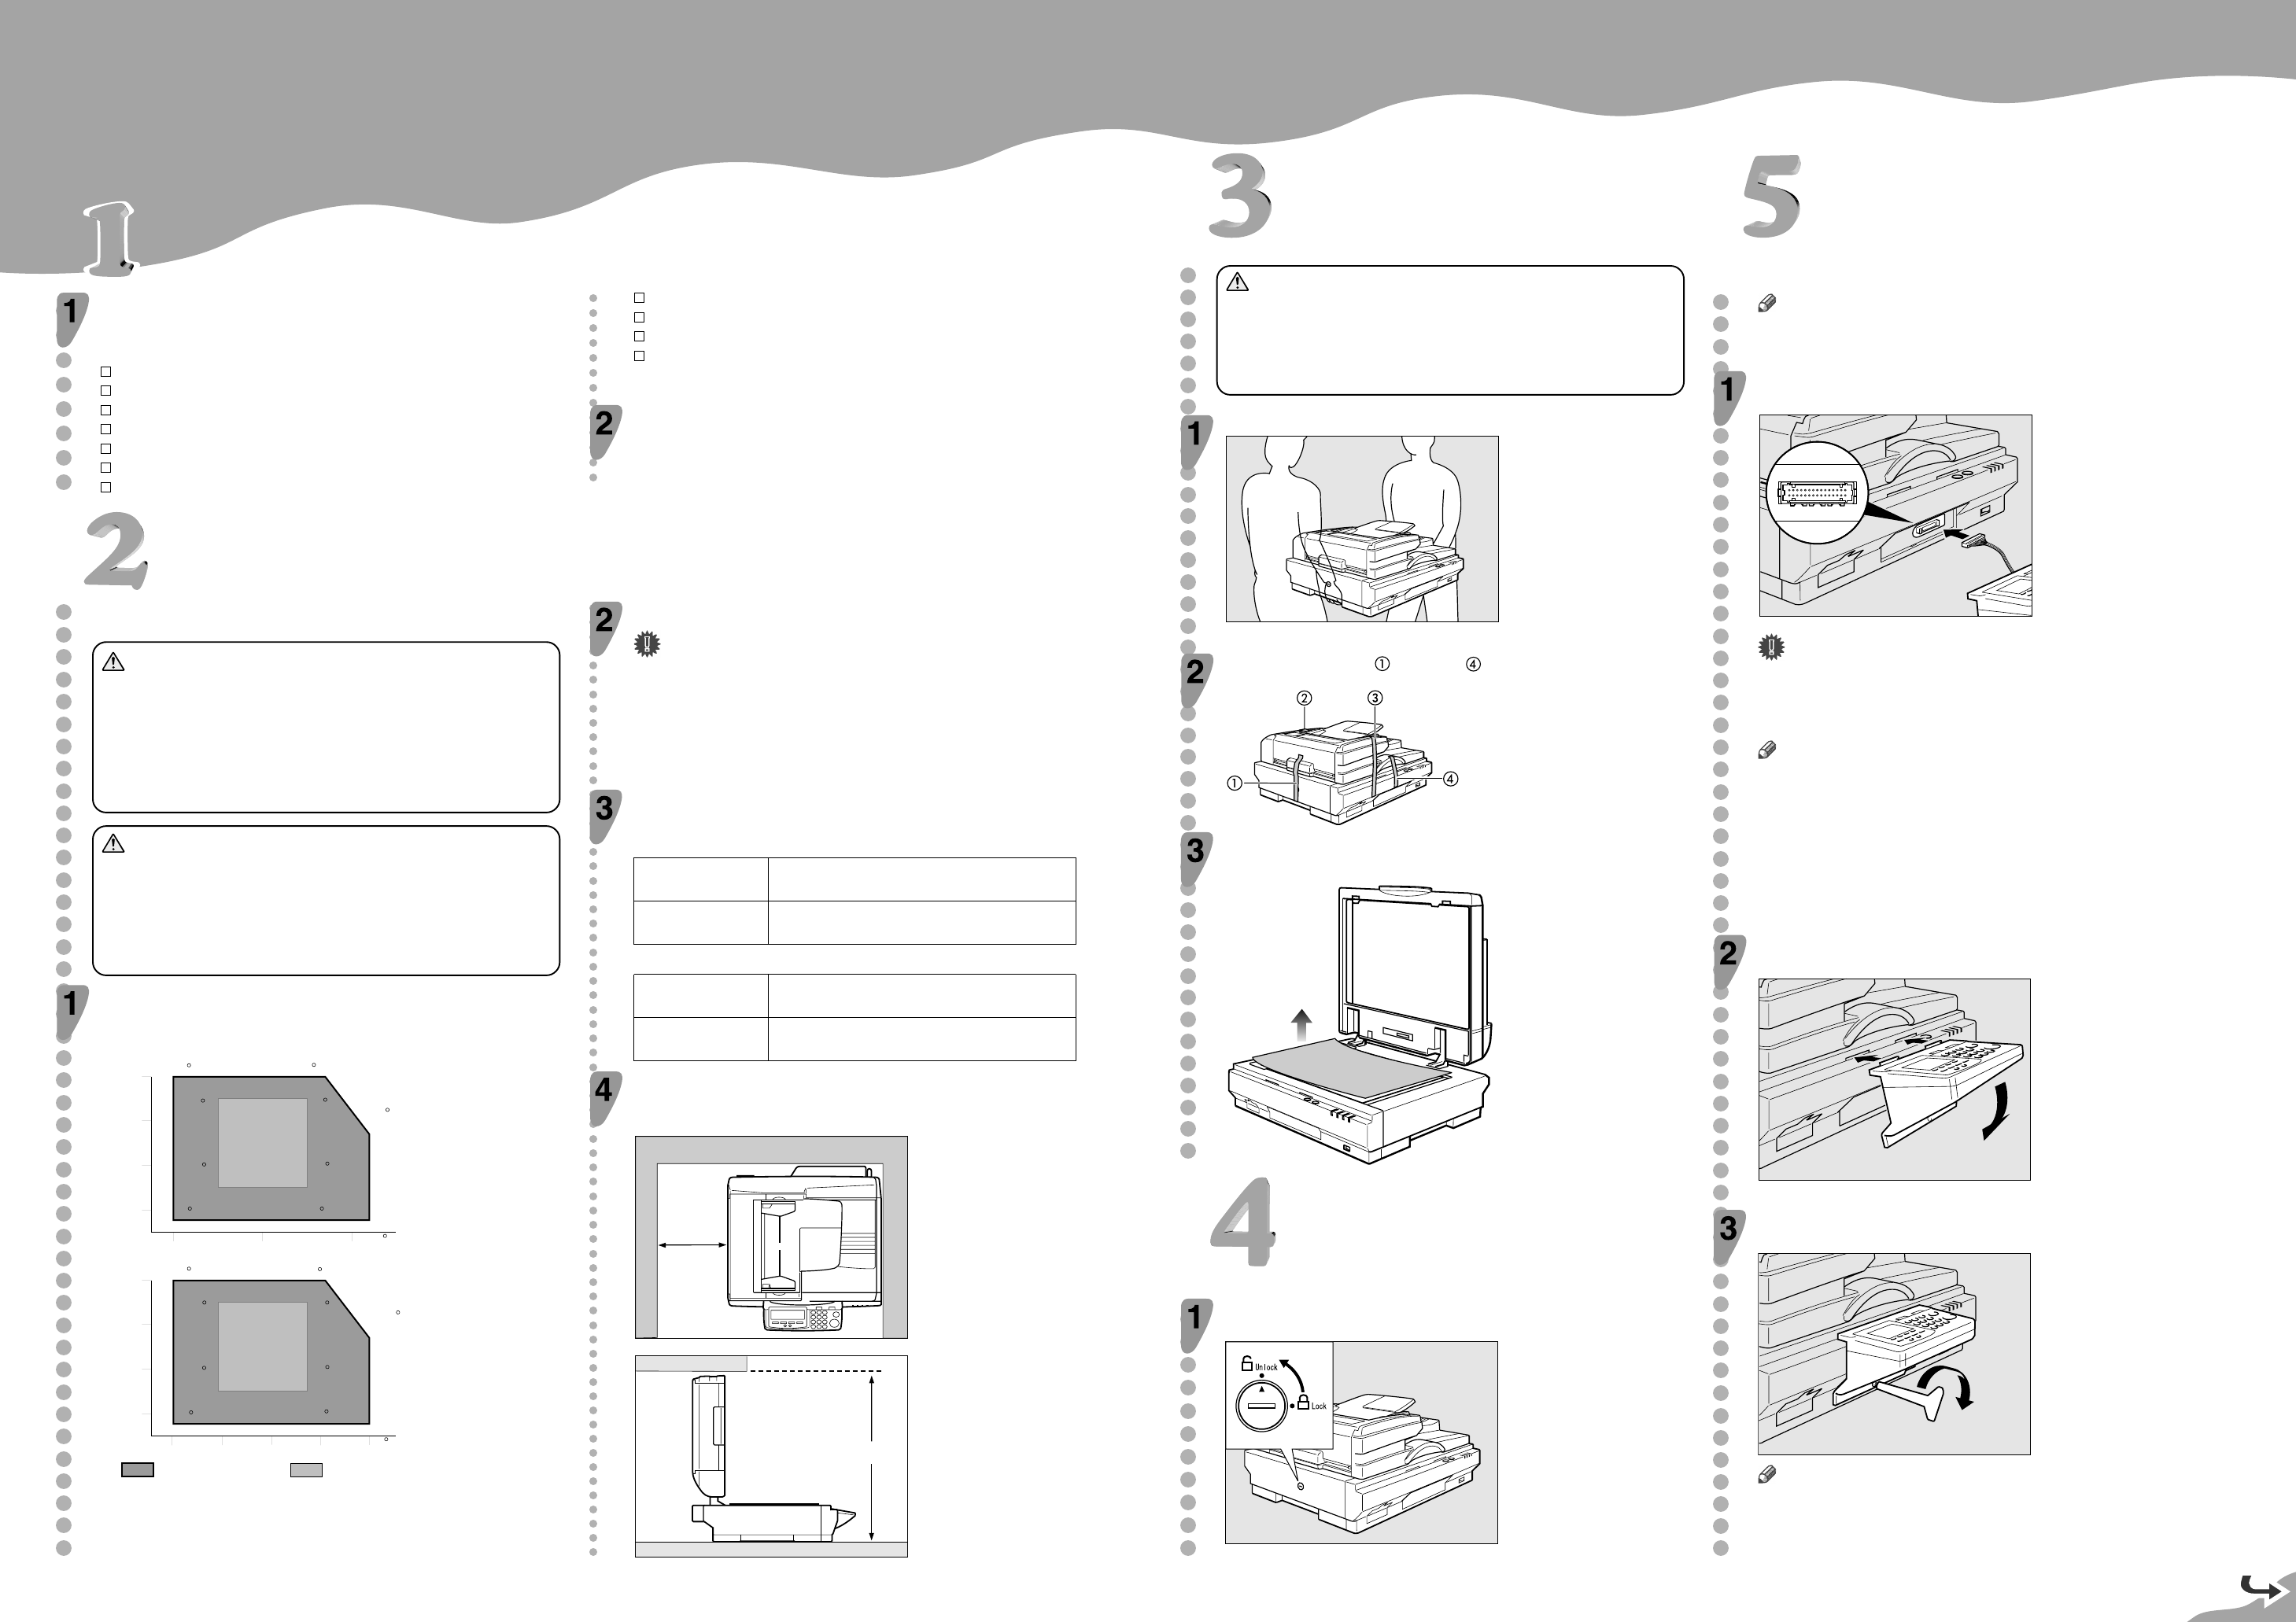
INSTALLING THE
SCANNER
DISENGAGING
THE LOCK
Attaching the Control
Panel Unit to the
Scanner Unit
Note
❒ Use the tool that comes with this machine when you tighten or loosen he
screws.
Insert the plug of the control panel unit into the con-
nector of the scanner unit, as illustrated below.
ABK011S
Important
❒ While making sure that the plug is facing in the correct direction, inset
the plug as far as it goes into the socket. It may be a bit tight to insert
the plug into the socket, so push the plug with a strength that is enough
for inserting it in place.
Note
❒ To avoid the plug being inserted in the wrong direction, the connector
has a number of tiny prongs inside and outside of it. When you insert
the plug into the connector, make sure that the connector is facing in
the correct direction. Inserting in the wrong direction creates the risk
of damage to the plug and the connector.
❒ Be careful not to pinch the cable when you attach the control panel
unit to the scanner unit.
❒ Locating the scanner unit at an end of a desk makes it easy to attach
the control panel unit.
Insert the hooks of the control panel unit to the scan-
ner unit.
ZDLp330
Secure the control panel unit using the screw that
comes with this machine.
ZDLp340
Note
❒ Do not open the cover located at the lower left of the control panel.
Changing configuration of the switches inside of the cover could cause
this machine to stop operating normally.
CAUTION
• This product weighs approximately 29kg.
• To left this product, hold the grip at the center of both sides with 2
people and lift slowly not to inflict too much burden on the carriers
body. Forcing yourself too much to lift or handling this product reck-
lessly may lead to injury.
Take out the scanner main unit.
ZDLH200E
Remove the tape ( through ).
ZDLH206E
Open the automatic document feeder(ADF) and remove
the protective sheet on the exposure glass.
ZDLH025E
Set the lock switch on left side of the scanner to the
"Unlock" position.
ZDLH215E