


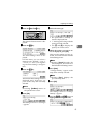

Registering Scan Settings
77
3
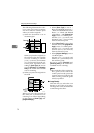
B Use the {
{{
{1
11
1}
}}
} and {
{{
{0
00
0}
}}
} keys to
highlight the item you want to
input, and then use the
number keys to input the val-
ue.
Note
❒ To correct the number you
have entered, use the {
{{
{1
11
1}
}}
}
and {
{{
{0
00
0}
}}
} keys to highlight it,
and then press the {
{{
{Clear
/Stop}
}}
} key to clear the
number.
❒ You can also use the {
{{
{#}
}}
} key
as well as the {
{{
{1
11
1}
}}
} and {
{{
{0
00
0 }
}}
}
keys to move selection.
C Press [OK].
This saves the setting you have
entered, and returns to the De-
fault Scan Settings menu.
Note
❒ Pressing [Cancel] discards the
values you have entered, and
returns to the Default Scan
Settings menu.
M
MM
M
Press [Next].
“4. Image Density ” appears as the
setup item currently selected.
N
NN
N
Press [OK].
The setting screen for “4. Image
Density ” appears.
O
OO
O
Use the {
{{
{1
11
1}
}}
} and {
{{
{0
00
0 }
}}
} keys to
highlight the setting you want.
P
PP
P
Press [OK].
This saves the setting you have se-
lected, and returns to the Default
Scan Settings menu.
Note
❒ Pressing [Cancel] discards the
selected setting, and returns to
the Default Scan Settings menu.
Q
QQ
Q
By pressing [Next] to display “5.
Erase Colour ” through “11. Orig-
inal Settings ” as the setup item,
select options for each of them in
the same way that you have done
in steps
D
DD
D
through
G
GG
G
.
R
RR
R
After all the settings are the way
you want, press [PrevMenu].
This registers the Scan Settings you
have configured to the “ Default ”
memory area, and returns to the
Scan Settings menu.
S
SS
S
While the Scan Settings menu is
displayed, press {
{{
{2}
}}
}, {
{{
{3}
}}
} or {
{{
{4}
}}
}
key to display a corresponding
User Scan Settings menu.
For example, press the {
{{
{2}
}}
} key to
display the User 1 Scan Settings
menu.