Configuring the Scanner Settings
52
3
System Settings
This section describes the setup items
contained in the System Settings
menu. They include an item used to
select the initial screen of the ma-
chine, and basic setup items for oper-
ating this machine on a network, such
as an IP address setting. This section
also shows you how to configure
these settings using the control panel
of this machine.
Note
❒ See p.186 “Using Wireless LAN”
for information about how to use
an optional wireless LAN card.
Information to Set in [System
Settings]
Note
❒ You can configure the settings that
are mentioned in this section, us-
ing the Web Status Monitor. How-
ever, you must configure the IP
address setting using the control
panel of this machine first. And
then, you can change the setting on
the Web Status Monitor.
❖ Function Priority
This item lets you select the initial
screen that is displayed when you
turn the power on.
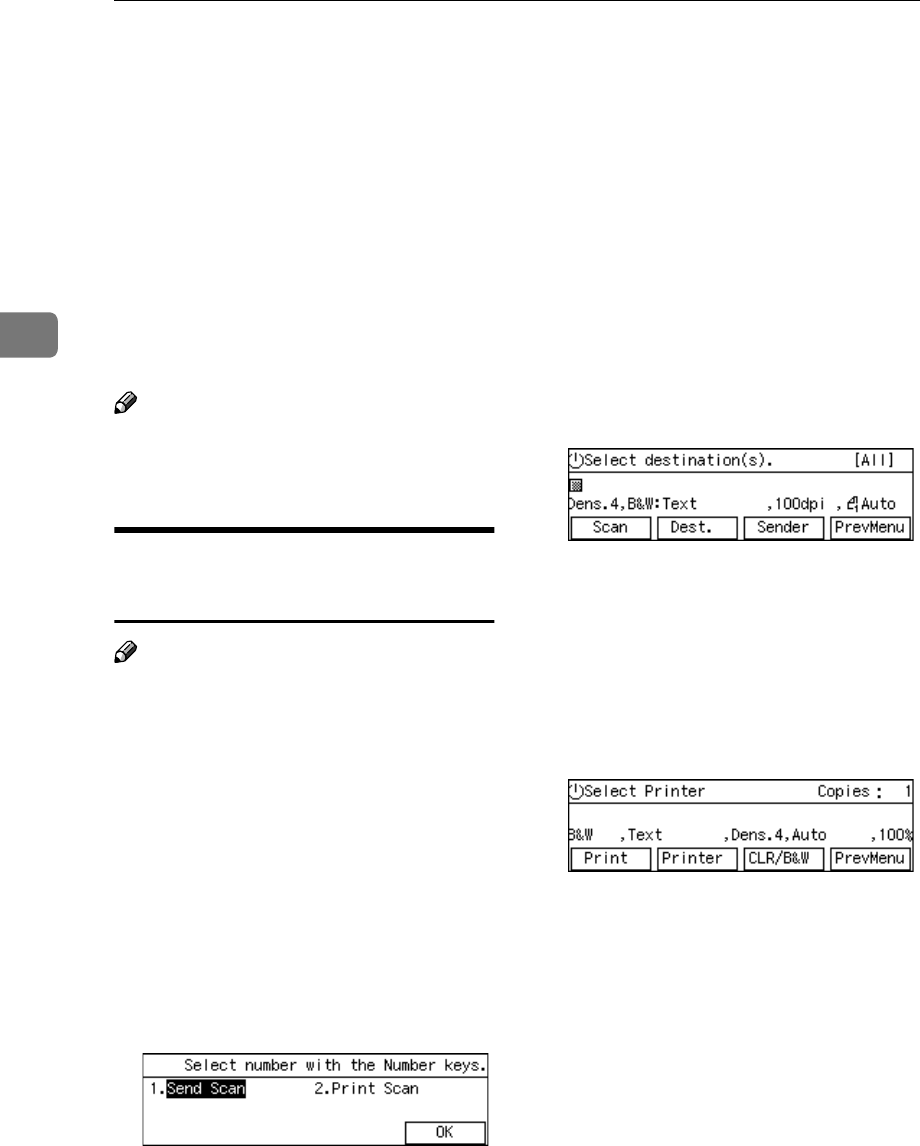
• Select: Send/Print
When you select this option, "
Select Method " screen is initial-
ly displayed. On this screen,
pressing the {
{{
{1}
}}
} key displays
the Delivery Server standby
screen or the E-mail/Send File
standby screen, depending on
the settings in [7.Select Method].
Pressing the {
{{
{2}
}}
} key displays
the Print Scan initial screen for
printing scan data.
• Send Scan
When you select this option, the
Delivery Server standby screen
or the E-mail/Send File standby
screen is initially displayed. The
screen initially displayed de-
pends on the settings in [7.Select
Method].
• Print Scan
When you select this option, the
Print Scan standby screen is dis-
played as the initial screen.
❖
❖❖
❖ IP Address
When a fixed IP address is as-
signed to this machine on the net-
work you use, enter the IP address
to this item in the form of
xxx.xxx.xxx.xxx (xxx:0 through
255).
Do not specify this item manually
when you use this machine on a
DHCP environment. An IP ad-
dress is automatically assigned to
this machine by selecting " DHCP "
for [Network Boot].


