


Initial Scanner Setup
41
3
Initial Scanner Setup
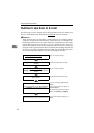
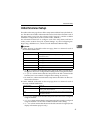
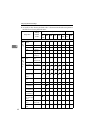
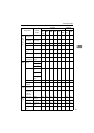
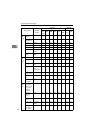
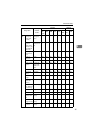
The table on the next page shows all the setup items and their factory default val-
ues. The table also includes information about for which of the functions each of
the setup items is used (see the columns under "Purpose"), and the available
method for configuration (see the columns under "Method").
For information about how to configure each of the setup items and how it
works, see the sections from p.52 “System Settings” to p.84 “Configuring Set-
tings Using a Web Browser”, and also see the Web Status Monitor Help.
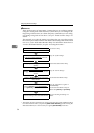
Important
❒ Under "Purpose" in the table on the next page, there is a column for each of
the functions listed below.
• A “” in a column means that the setup item to the left is essential to use
the function. Be sure to configure these settings before using this machine.
• A “b” in a column means that the setup item to the left is related to the
function, but is not essential. Configure these settings as necessary.
• No mark in a column means that the setup item to the left has no direct re-
lation to the function.
❒ Under "Method" in the table on the next page, there is a column for each of
the setup method listed below.
• A “b” in a column means that the setup item to the left can be configured
using the method.
• A "x" in a column means that the setup item to the left cannot be configured
using the method. Use the other available method for the setting.
• A "-" in a column means that the item to the left cannot be changed (for the
display information purpose only).
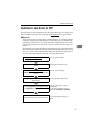
Column name: Means the function for:
Delivery Server Sending scan files by a delivery server using ScanRouter V2
Professional/Lite.
Mail Sending scan files as e-mail attachments.
SMB Sending scan files to a Windows shared folder.
FTP Sending scan files to an FTP server.
Print Printing scan files.
TWAIN Using this machine as a network TWAIN scanner.
Column name: Means if:
Scanner Each of the setup items to the left can be configured using the
control panel of this machine.
Web Each of the setup items to the left can be configured using the
Web Status Monitor.