


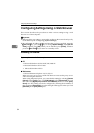

Configuring the Scanner Settings
88
3
❒ The changes are be discarded if
you click [Cancel].
H
HH
H
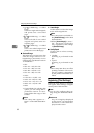
By selecting [User 1], [User 2], or
[User 3] in the [Select User] area, re-
peat steps
F
FF
F
and
G
GG
G
for each of
them, as necessary.
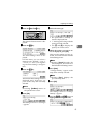
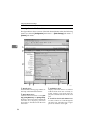
Configuring [E-mail Address]
A
AA
A
Click [Configuration] on the main
menu.
The password input dialog box ap-
pears.
Note
❒ Once you set the password, the
password input dialog box will
not appear from the second
time. When the dialog doesn’t
appear, proceed to
D
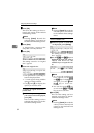
B
BB
B
Enter “scanner” for the user name,
and enter password.
Note
❒ The user name is fixed to “scan-
ner”.
❒ The password is set to “pass-
word” as the factory default.
You can change the password
using [Configuration] → [Basic
Settings] → [Password].
C
CC
C
Click [OK].
Settings screen appears.
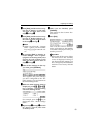
D
DD
D
Click [E-mail Settings], and then [E-
mail Address] in the sub-menu ar-
ea.
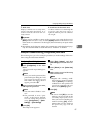
E
EE
E
Follow the steps below to register
an e-mail address, change or de-
lete an existing e-mail address, ex-
port address data to a CSV file, or
import address data from a CSV
file.
To register an e-mail address
A Click [Add].
B Make entry to or select an op-
tion for each of the setup items
on the screen.
C Click [OK].
Note
❒ Be sure to click [OK] to save
the settings you have made
on the currently displayed
screen. Once you move to an-
other page without clicking
[OK], all the settings that you
have made on the previous
page will be cleared.
❒ Input information is cleared
when you click [Cancel].
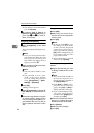
To change an existing e-mail
address
A Display the item that you want
to change within the list on the
screen.
Note
❒ You can select the number of
items to be displayed at a
time by selecting a number in
the [Display Items] box.
❒ Click [Next] or [Prev] to dis-
play the next or previous
page. Click [Top] or [End] to
display the first or last page.
❒ If you want to display a spe-
cific page, enter the page
number in the [Page(s)] box,
and then press [Go].
B Select the item that you want to
change, by clicking the option
button to the left of the item.
C Click [Change].
D Make necessary changes.
E Click [OK].