Chapter 6 Daily Care
Appendix
Glossary
Introduction
Index
Contents
TOP
88
How to Load
Documents
Configuring the
Scan Settings
How to Use the
Operator Panel
Various Ways to
Scan
Troubleshooting
Replacing the
Consumables
Scanner
Overview
Daily Care
Operational
Settings
The inside of the scanner should be cleaned with a piece of
cloth/Cleaning Paper moistened with Cleaner F1, or a sheet of
Cleaning Wipe.
As the scanner continues to feed the documents, paper dust
will accumulate inside the scanner and it may cause scanning
errors.
As a guideline, clean the inside of the scanner every 1,000
sheets scanned. Note that this guideline varies depending on
the type of documents you scan. For instance, it may be
necessary to clean more frequently when you scan
documents on which the toner is not sufficiently fused.
1 Turn off the scanner and wait for at least 15 minutes.
For details, refer to "1.3 Turning the Power ON/OFF" (page 18).
2 Open the ADF.
For details, refer to "1.4 Opening/Closing the ADF" (page 19).
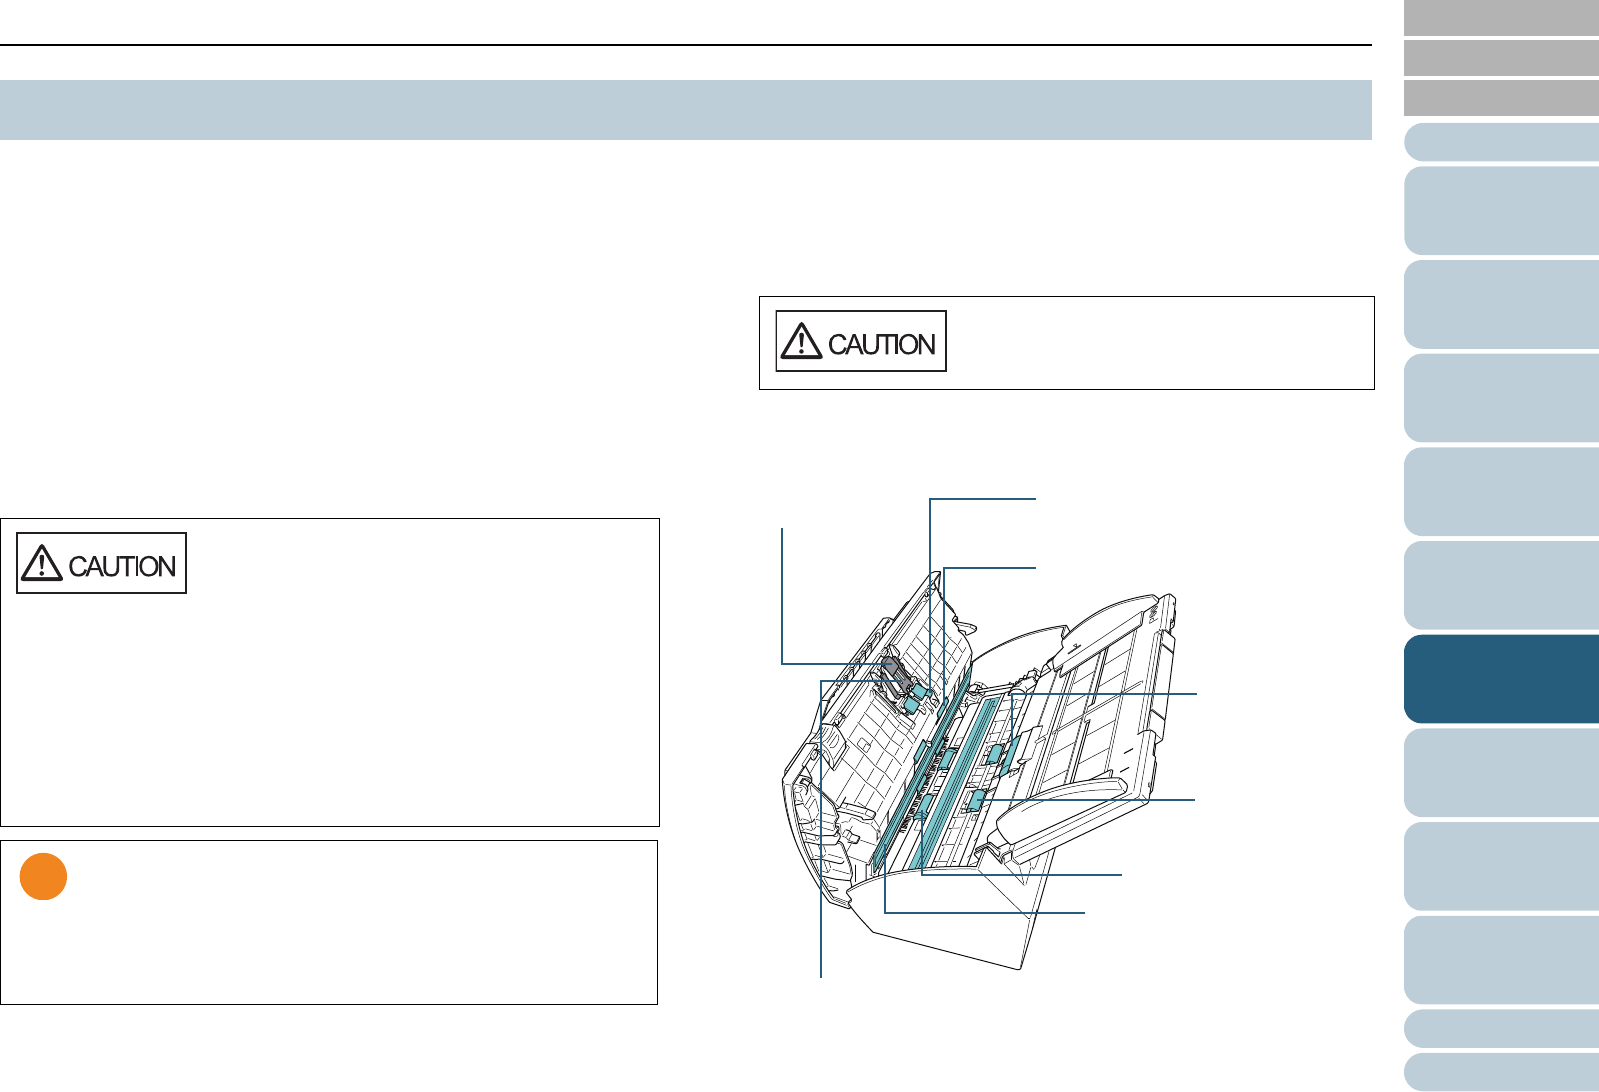
3 Clean the following locations with a cloth/Cleaning Paper
moistened with Cleaner F1, or a sheet of Cleaning Wipe.
6.3 Cleaning the Inside
z The glasses inside the ADF become very hot
when the scanner is being used.
When cleaning the inside of the scanner,
make sure to unplug the power cable and wait
for at least 15 minutes before you start
cleaning.
z When you perform cleaning, make sure that
the inside is free of foreign matter, and be
careful not to get your hand or the cloth
caught on the pick spring (metal part) as a
deformed pick spring (metal part) may cause
injury.
z Do not use water or mild detergent to clean the inside of the
scanner.
z It may take a long time to dry if an excessive amount of
Cleaner F1 is used. Moisten the cloth with moderate
quantity. Wipe off the cleaner completely to leave no
residue on the cleaned parts.
Be careful not to have your fingers caught
when the ADF closes.
Glass (×2)
*one on the opposite side
Pick Spring (metal part shown in gray)(×1)
Pick Roller (×1)
Ultrasonic Sensor (×2)
*one on the opposite side
Idler Roller (×4)
Feed Roller (×2)
Eject Roller (×2)
Pad Assy (×1)
