Assembly\Disassembly 5-6
NovaJet 800 Series Service Manual
CAUTION
Applying too much torque to the lower screws can cause
the mounts for the standoffs on the cover to break, requir-
ing a replacement of the cover.
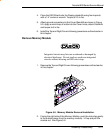
4. Secure the Right Cover with two screws located on the left side (torque
to 15 in-lbs) and three located under the baseplate (torque to 8 in-lbs.)
To install the Top Cover:
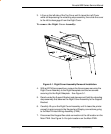
1. Insert the pin located on the right side of the Top Cover into the
corresponding hole on the Right Cover Assembly.
2. While depressing the retracting stop assembly on the left side of the
Top Cover, lower the left side of the Top Cover into position and secure
it to the Left Cover by releasing the retracting stop assembly.
Remove the E-Connect Network Assembly
CAUTION
Integrated circuits may beweakened or damaged by elec-
trical discharge. Do not touch or work near integrated
circuits without wearing an ESD wrist strap.
1. Disconnect the network cable and the small parallel cable from the
back of the E-Connect Network Assembly.
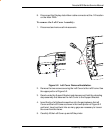
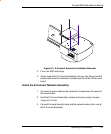
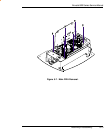
2. Locate and remove the 4 screws securing the E-Connect Network
Assembly to the bottom of the Platen. See Figure 5-3.


