NovaJet 800 Series Service Manual
Assembly\Disassembly 5-23
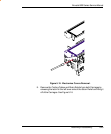
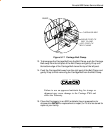
7. Remove the Floating Carriage Cover from the Left and Right Support
Brackets. The Floating Carriage Cover is part of the Ink Delivery
System. See Figure 5-13.
8. Carefully slide the Ink Delivery System out of the left side of the printer.
Install the Ink Delivery System
1. Carefully slide the Ink Delivery System into the printer.
2. Secure the Floating Carriage Cover to the Left and Right Support
Brackets. Torque to 6 in-lbs.
3. Secure the Ink Delivery System Bracket to the Left Frame. Torque to
15 in-lbs.
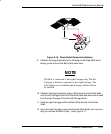
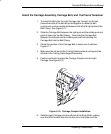
4. Secure the Ink Delivery System to the Chain Support Bracket. See
item B in Figure 5-11. Torque to 15 in-lbs.
5. Reattach the Chain Support Bracket to the Rear Support Bracket.
See item A in Figure 5-11. Torque to 15 in-lbs.
6. Secure the Fitting Mount Bracket (left portion of the Ink Delivery
System) to the Left Frame using six screws. Torque to 15 in-lbs.
7. Install the Top, Left and Right Covers following procedures outlined
earlier in this chapter.
Remove the Carriage Assembly, Carriage Belt, and the Frame
Tensioner
1. Remove the Top, Left and Right Covers and the Ink Delivery System
following procedures outlined earlier in this chapter.
2. Obtain the Belt Removal Tool, spin the movable side to shorten the
distance between the two brass pieces.
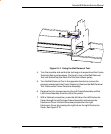
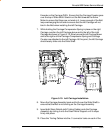
3. Insert the Belt Removal Tool between the Left Frame Assembly and
the Frame Tensioner. See Figure 5-14. Ensure that the movable side is
against the Left Frame Assembly and the non-movable side is against
the Frame Tensioner.


