


7
Chapter 7 Location and Function of Parts and Controls 116HDC-900/950/930 Series Product Information Manual
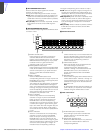
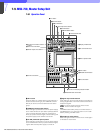
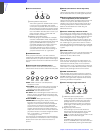
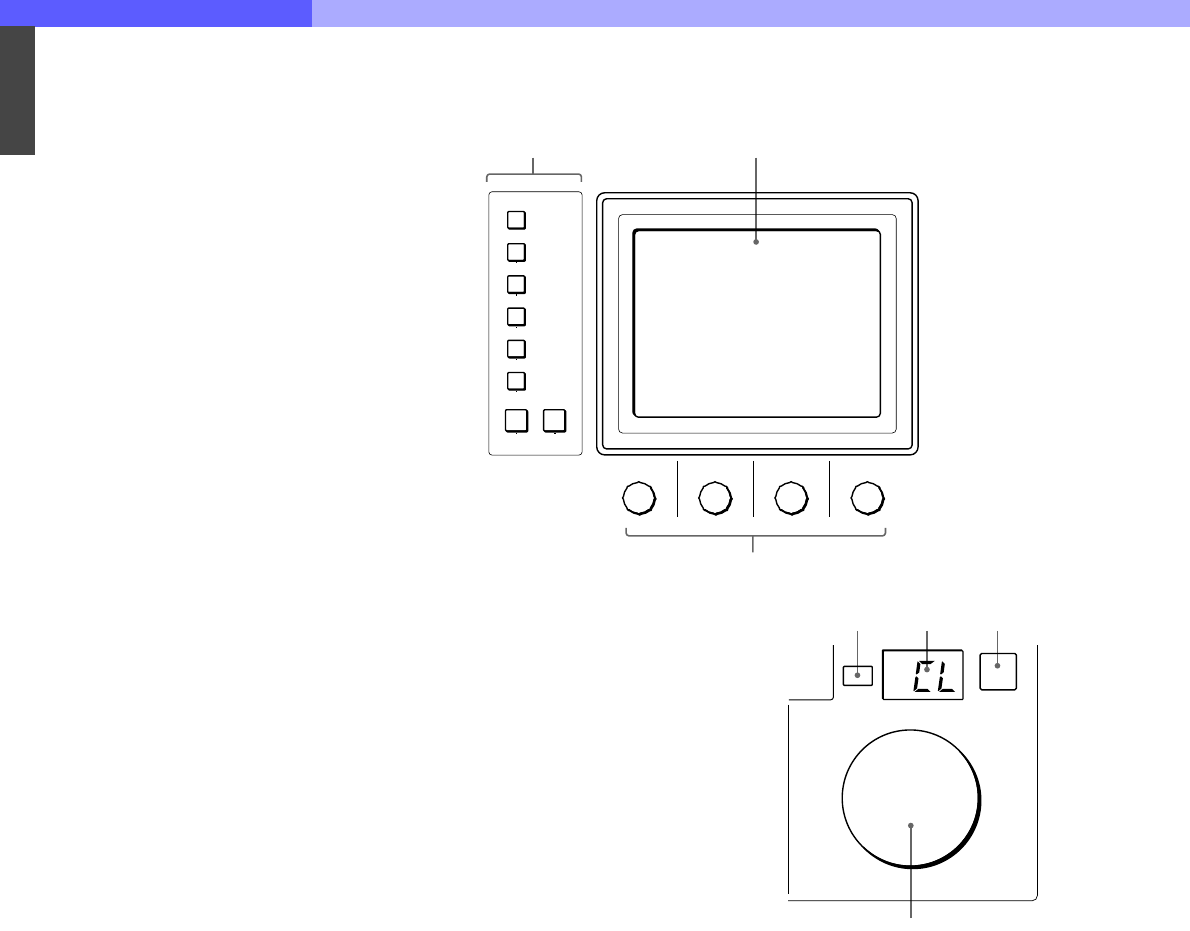
n Menu operation block
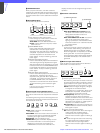
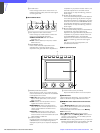
A MODE (mode select) buttons
Select the menu mode. If you press and light
one of these buttons, the menu for the selected
mode appears on the EL display. When the lit
button is pressed again, it goes dark and the
menu on the display also disappears.
MULTI: Selects Multi-Control menu to set the
requirements for Master/Slave mode to set up
multiple cameras in synchronization.
CARD: Selects IC memory card menu to
initialize IC cards.
CONFIG: Selects Configuration menu to
configure this unit and the entire camera
system.
MAINTENANCE: Maintenance mode to set
various camera maintenance items and the H
and SC phases of CCU, etc.
FILE: Selects File operation menu to retrieve
and transfer reference files, lens files and
scene files in the video camera or on IC
cards.
PAINT: Selects Paint control menu to adjust
various paint items, such as white, black and
flare.
FUNCTION: Selects Function menu to control
various camera and CCU functions.
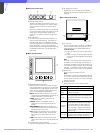
B EL display/touch panel
Displays the menu selected with the MODE
buttons and permits the displayed items to be
adjusted.
C Control knobs (rotary encoders)
Adjust the selected items on the touch panel.
o CALL button
Press to send a call signal to the video camera, on
which the CALL button lights. The tally lamps on the
camera and the red tally lamp on the CCU light when
not lit, or go dark when lit. When the CALL button on
the video camera is pressed, the CALL button on this
unit lights and a buzzer sounds.
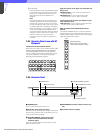
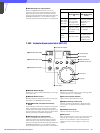
p IRIS/MB ACTIVE (iris/master black active)
button
Press and light up this button to enable the iris and
master black adjustment functions of the unit. When
the PANEL ACTIVE button is pressed, this button
automatically lights. To disable only the iris/ master
black control block of the panel, press this button so
that it goes dark.
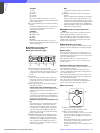
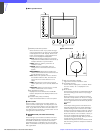
q Iris control block
A EXT (lens extender) indicator
Lights when the lens extender is used.
B Iris display window
The iris value is displayed in f numbers. When
the iris is closed, “CL” is displayed in the
window.
C AUTO button
Press and light the button to automatically adjust
the iris according to the amount of input light
(Auto Iris).
When this button is lit, the reference value for
automatic iris adjustment can be set in a range
of ±2f with the iris control. If you press the button
when lit, it goes dark and manual iris adjustment
is enabled.
Note
If the subject being used as the reference for
automatic adjustment is lost while operating a
camera having the skin tone auto iris function,
the skin tone auto iris stops functioning, and the
iris value at that time is maintained. The AUTO
button then flashes. In this condition, not only is
the iris not automatically adjusted but also it
cannot be changed manually. When you wish to
change the iris, turn Auto Iris off.
If Auto Iris is kept ON, the skin tone auto iris will
start functioning when the subject for reference
is resumed.
MODE
MULTI
CARD
CONFIG
MAINTENANCE
FILE
PAINT FUNCTION
1
3
2
IRIS
AUTO
EXT
12
4
3