


2
Chapter 2 Total System 40HDC-900/950/930 Series Product Information Manual
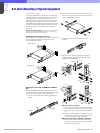
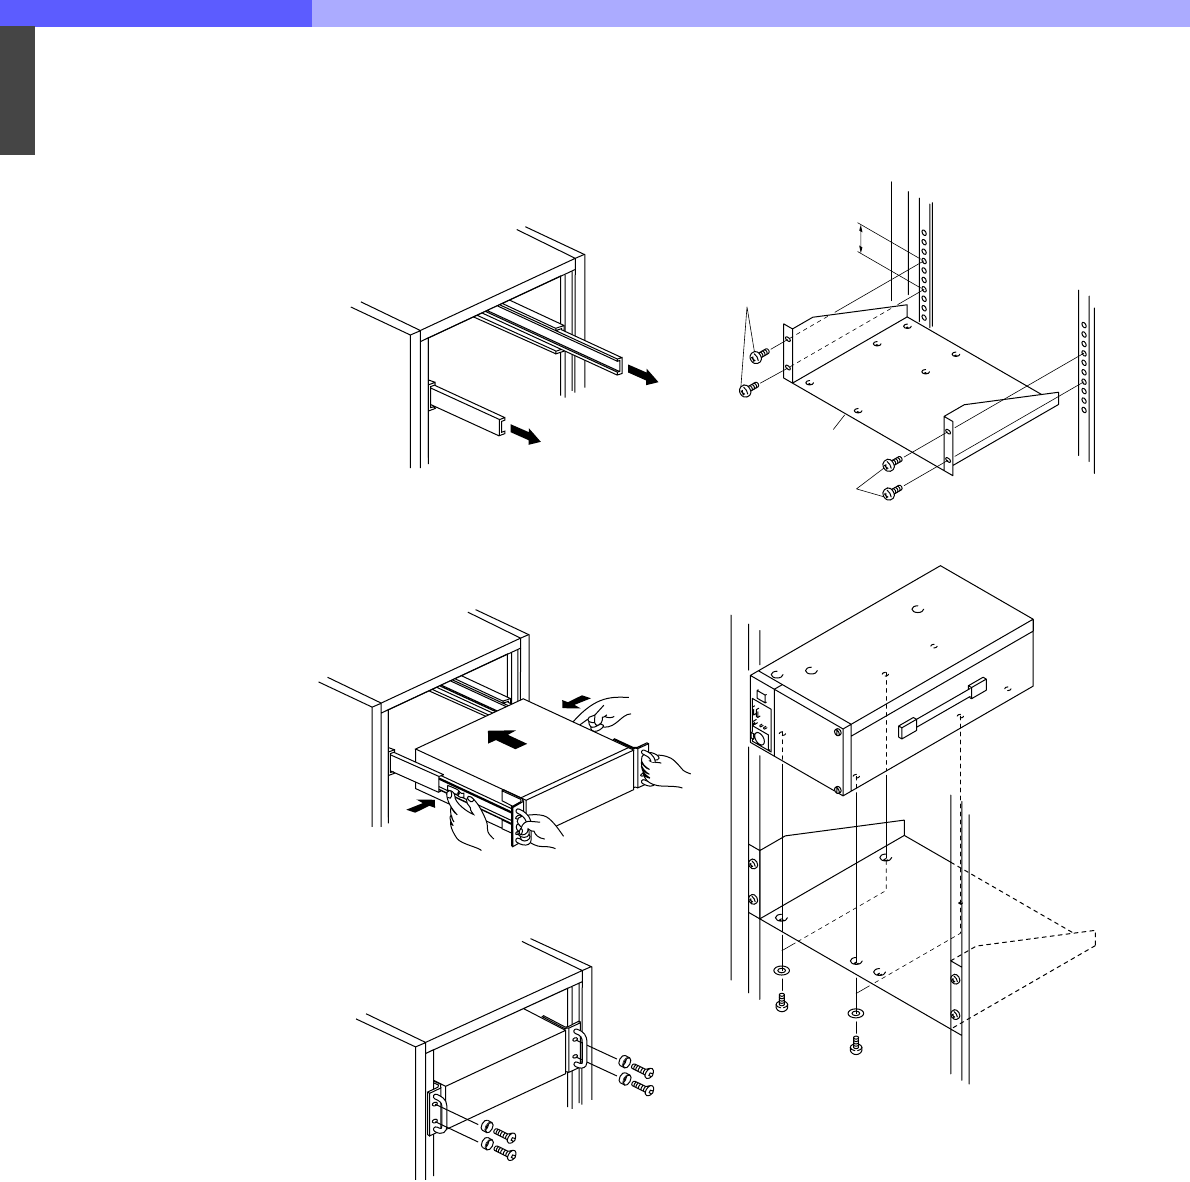
(2) Attach the rear bracket to the outside of the rear
of the rack at the screw holes at 31.75 mm
intervals, using screws (d).
5. Fasten the screws loosened in step 3.
6. Pull the rails out.
7. Insert the inner member to the outer member while
pushing against the stopper, and then fully push
the unit into the rack.
Warning for Safety Purpose: It takes two or more people
to mount a unit into a rack. Mounting the unit into a rack by
yourself can cause back or other injuries.
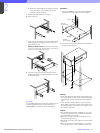
8. Push the unit into the rack, and secure the front
panel to the rack with screws (+RK M5 x 16 to 20)
and washers (φ 5).
HDCU-950
The two HDCU-950 can be mounted in parallel in a 19-
inch EIA standard rack by using the rack mount
adapter RMM-301 (optional). (Three-unit height)
Installation
1. Secure the RMM-301 in the 19-inch EIA standard
rack with the four B5 screws (6 mm or longer).
2. Secure the unit with the supplied four screws (B4 x
6) and the four washers.
Warning
• If the rack falls due to the weight of the equipment, it
may cause death or major injury. To prevent the rack
from falling or moving, be sure to fix the rack to the
floor.
• If the rack falls, death or serious injury may result.
When attaching the unit, be sure to fix the rack to the
floor and be careful not to attach at a height of 1.2 m
or higher from the floor.
Caution
• Use the specified rack mount adapter. If not, injury
could occur by drop of the unit because strength of
the shelf board is not enough.
• Mount the unit with more than two persons. A one-
man job may cause injury.
• Be careful not to catch your finger or hand in the rack
mount rail.
• Mount in the rack in a stable position. Injury could
occur by drop of the unit in unbalance condition of
57.2 mm
B5 screw
(6 mm or longer)
B5 screw
(6 mm or longer)
RMM-301
B4
x 6
W4
B4 x 6
W4