Calibration
Back
IndexContents
Next
86
To make temporary color adjustments:
1. From the Calibration menu select Send LUT to
Printer.
2. Select a Media name from the drop-down list,
then click Next. (If there is only one media type
in the calibration database, omit this step.)
3. Select an event number and date, then click
Next.
4. Select Apply Master Balance to apply a
temporary adjustment to the colors for this print
job.
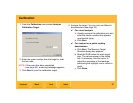
5. Adjust the temporary values for the Red, Blue,
Green, and Density and click Next.
6. Ensure that all printing has stopped, then click
Finish in the Send LUT to Printer dialog box.
NOTE: When sending a temporary color
adjustment, the final dialog box is a different
color than the other dialog boxes in the wizard.
Performing a Complete Calibration Analysis
Performing a complete calibration cycle includes
printing and analyzing a calibration target.
If you perform a complete calibration cycle, you
cannot print anything else until the cycle is
complete.
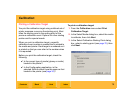
1. From the Calibration menu select Perform
Complete Calibration Cycle.
2. Select the media to calibrate, then click Next.
3. Select a starting point (see page 78).
NOTE: If you select Designated Calibration Event
as a staring point, you must select an event
number and date from the drop-down list.
4. Click Next to print the calibration target.
5. Analyze the target (see page 80).


