


34 en | Installing a Wall Mount AutoDome Junior HD
F.01U.275.803 | 6.0 | 2012.11 Installation Manual Bosch Security Systems, Inc.
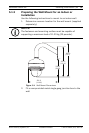
5 Installing a Wall Mount
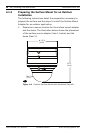
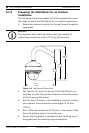
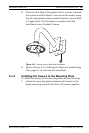
5.1 Description
This chapter details how to mount the AutoDome Junior to a
wall. The AutoDome Junior is also suitable for surface
(Section 4 Installing a Surface Mount, page 23), recess
(Section 6 Installing a Recessed Mount, page 46), and pipe
mounting (Section 7 Installing a Pipe Mount, page 66). For
specific directions on mounting the unit, see the manual that
came with your mount.
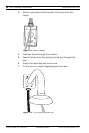
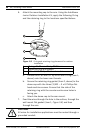
For an outdoor installation you must obtain the gaskets and O-
rings supplied with an AutoDome Junior Outdoor Camera to
ensure a water-tight environment inside the unit and to
maintain an IP Environmental Protection Rating. Refer to
Section 5.1.3 Preparing the Wall Mount for an Outdoor
Installation, page 38, to start an outdoor installation.
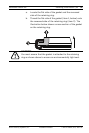
5.1.1 Additional Tools Required
– Appropriate straight slot screwdrivers
– No. 2 Phillips screwdriver
– T-10 Torx wrench
– AutoDome Junior Outdoor Camera, required for an
outdoor installation
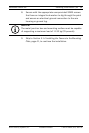
NOTICE!
The image sensors in modern cameras are highly sensitive and
require special care for proper performance and extended
lifetime. Follow the guidelines for optimum results with your
camera:
– Do not expose to direct sunlight or bright spotlights in
operating and nonoperating conditions.
– Avoid bright lights in the field of view of the camera. Bright
lights cause a “smearing” effect, which is visible as white
lines above and below the highlight. Prolonged exposure to
bright lights may cause bleaching of the sensor's color
filters. This will be visible as colored spots in the picture
and is irreversible.