


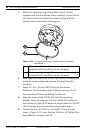


58 en | Installing a Recessed Mount AutoDome Junior HD
F.01U.275.803 | 6.0 | 2012.11 Installation Manual Bosch Security Systems, Inc.
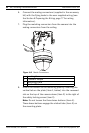
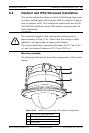
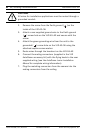
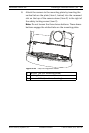
5. Attach the retaining ring with gasket (item 2, below,
supplied with the AutoDome Junior camera) to the VJR-A3-
JW. Ensure that the side of the retaining ring with the
counter-sunk screw holes is facing you.
Figure 6.12 O-ring and retaining ring placement for outdoor
installation
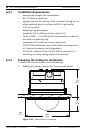
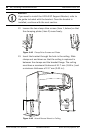
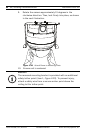
6. Determine the side of the VJR-A3-JW in which the external
wires are to be routed and remove the plug from the
knockout.
7. Apply a 1/2-in. (15-mm) NPS fitting to the chosen
knockout. Ensure a water-tight fitting to maintain the IP
Environmental Protection Rating for the unit.
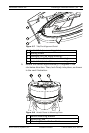
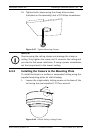
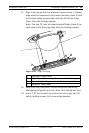
8. Align the holes of the VJR-A3-JW with the mounting
bracket. Note the alignment of the VJR-A3-JW relative to
the bracket in Figure 6.13 below to ensure that the VJR-A3-
JW knockouts are not covered by the bracket arms.
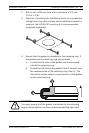
9. Thread the four (4) 3.97 mm I.D. by Ø1.78 mm O-rings
(item 1, Figure 6.13) onto the four (4) M4 x 16 Phillips Pan
Head Machine Screws (item 2).
1 M3 – .5 x 6 Phillips flat head machine screws
(supplied with AutoDome Junior Camera)
2 Retaining ring with gasket
(supplied with AutoDome Junior Camera)