


258 Ion Operations Manual
About Submasters
Submasters can store any parameter data for channels. When storing from Live, Record Only and
Record can both be used to determine what contents are stored. You can copy cues, presets, or
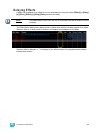
palettes to a submaster as well. Channels running effects can be loaded onto a submaster. See
“Effects on Submasters” on page 254. Submasters can be accessed using the slider module (see
Slider Module, page 220) or the Universal Fader Wings (see Universal Fader Wings, page 389).
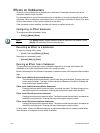
Faders can be configured as submasters in setup (see Fader Configuration, page 98) or they can
be defined while programming.
In blind, submasters can be created by using the [Thru] [Thru] syntax.
• [Sub] [1] [Thru] [Thru] [1] [0] [Enter] - will create subs 1 through 10.
To automatically set the submasters to 1-to-1, in blind, press [Sub] [1] [Thru] [Thru] [3][0][0]
[Enter] to create all 300 submasters. Now in Live, press [Sub] [1] [Thru] [Enter], which selects all
submasters created. Then you can hit the load button for the first submaster and it will load all
submasters sequentially.
When set as a submaster, the bottom button beneath the potentiometer acts as a bump button or a
mark button depending on the submaster type (Proportional or Intensity Master). The button above
the bump can be used to select all of the channels associated with the submaster, if the submaster
is inactive. This is equivalent to the syntax [Group] [Sub] [x] [Enter]. When the submaster is
active, this button will assert the contents of the submaster when pressed.
It is possible to program upfade, dwell, and downfade times in association with the submaster
bumps.
On fader wings, when a submaster bump LED is blinking, it means that the submaster must be
homed due to either changes to its content or to its mode. In either case, reset the submaster by
dropping it to zero and the moving it back to the desired position. Inhibitive submasters (see below)
that are blinking must be homed to 100% rather than zero. The LED will also blink when the
submaster is in a “Held” state via bump button timing
Recording a Submaster
You can record current stage contents directly to a submaster. To do this, set levels in live as
needed then record them to the submaster. See the following examples:
• [Record] [Sub] [5] [Enter] - records all current values to sub 5.
• [Record Only] [Sub] [5] [Enter] - records the manual values of the current stage state to sub
5.
• [Record Only] [Sub] [5] [Label] [xxxx] [Enter] - as above, with a label.
• [Record] [Sub] [5] {Mode} [Enter] - as above, and alters mode between inhibitive or additive.
Other submaster properties (HTP/LTP, Exclusive, and so on) can be assigned in this way as
well.
You can also record selected channel data to submasters as well. See below:
• [Channel List] [Record] [Sub] [5] [Enter] - records all data for the channel list to sub 5.
• [Channel List] [Record Only] [Sub] [5] [Enter] - records manual data for the channel list to
sub 5.