


18 Ion Operations Manual
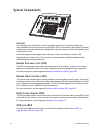
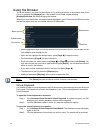
Setting Up the Hardware
Follow these steps to prepare your Ion for use.
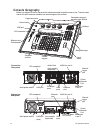
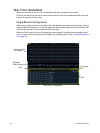
Step 1: Place your console on a firm, level surface. Be sure to leave space for access to the
rear of the console. You will need to connect several items to the ports on the back.
Step 2: Connect any monitors to the proper ports on the back of the console.
Step 3: Connect the keyboard and mouse. Attach to the appropriate connector on the back of
the console.
Step 4: If you will be connecting to an Eos Family network, connect the appropriate Ethernet
(CAT 5 or better) cable to the Ethernet port on the back of the console.
Step 5: If you plan on using the DMX ports on the back of Ion to control your lighting system,
attach the appropriate DMX connector and cable to the desired port. These ports
default to output DMX universes one and two. Configuration is required to use any
other universe. For more information, see Local DMX Outputs, page 351 in the ECU
appendix.
Step 6: Attach the appropriate IEC power cable for your location to the IEC connector on the
back of the console, just above the power switch.
Your console hardware is now ready to be powered up.
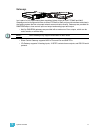
Note:
Ion supports up to 2 monitors, either 2 DVI -D monitors or 1 DVI-D and 1 VGA.