


5- 40
NetWare Settings (Windows)
TOP
Chapter 3
Printing Methods for
Different Objectives
Chapter 4
Maintaining the
Printer
Chapter 5
Using the Printer in a
Network Environ-
ment
Chapter 6
Troubleshooting
Chapter 7
Operation of the
Function Menus
Index
Contents
Chapter 2
Using a Variety of
Media
Chapter 1
Basic Procedures
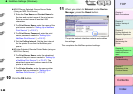
Setting NetWare Protocol
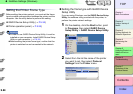
The printer protocol settings can be set with a Web browser
(Remote UI) from your computer. Set the IP address before
you perform these settings. (→ P. 5- 7 )
Setting the Protocol with Web Browser
(Remote UI)
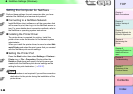
Important
z
For the Web Browser, use Netscape Navigator/
Communicator 6.0 or later, or use Internet Explorer 5.01
or later.
z
The connection cannot be set up through a proxy server.
If the network environment employs a proxy server, in the
Web Browser proxy server settings add the IP address of
the printer to the
Exceptions
(addresses not used by the
proxy). (The settings may differ, depending on the
network environment.)
z
In the Web Browser perform the settings so JavaScript
and cookies can be used.
z
If more than one remote UI is being used, then the most
recently used settings remain enabled. Starting and using
only one Remote UI at a time is recommended.
Note
z When the Remote UI is running with the printer name,
make sure that the DNS settings for the DNS
environment and board have been set up correctly.
z When print history is displayed with RPrinter/NPrinter
with the Remote UI running, the Document Name and
User information cannot be acquired. For this reason
the Document Name is set to Unknown the User is
set to RPRINTER/NPRINTER (only these settings are
displayed).
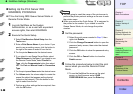
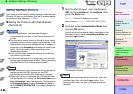
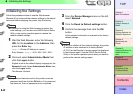
1
Start the Web Browser, enter the following
URL for the Location or the Address, then
press the Enter key.
http://<Printer IP Address or name>/
Entry Sample : http://XXX.XXX.XXX.XXX/
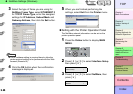
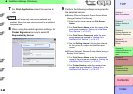
2
Click and select Administrator Mode then
click the OK button.
English is set as the default display language for the
Remote UI mode. Select Administrator Mode, then
click the Logon button.
The Remote UI starts.
Note
z If a password has been set for the printer, enter the
password and then click the Logon button. If no
password has been set, then no password entry is
required.