CHAPTER 15: POWER CONTROL 171
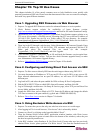
Chapter 15: Top-10 Use Cases
This chapter includes 10 of the mostly common cases to help familiarize users quickly with
practical operation on DSX unit. Please note that data entered in the case are created as examples,
and could vary upon different situations.
Case 1. Upgrading DSX Firmware via Web Browser
1. Purpose: To upgrade DSX firmware version for enhanced features or service patches.
2. Check Raritan support website for availability of latest firmware version:
(http://www.raritan.com/support/firmwareupgrades
and look for SX under Dominion Family)
3. Download the new SX firmware stored as UpgradePack from Raritan support website to an
FTP server (for example, a FileZilla server), assuming that FTP server has an IP address of
192.168.51.204. Extract the zip file to a folder under FTP root directory, for example:
\home\downloads\firmware\UpgradePack_2.5.6_3.1.0.5.2\Pack1of1
. Make sure the folder is
accessible by an FTP user account that you have.
4. Then, log in the SX through a web browser. Select Maintenance Æ Firmware Upgrade. Enter
FTP server IP address (e.g. 192.168.51.204), FTP username and password, and the FTP
folder path where the extracted files are stored (in this example:
/UpgradePack_2.5.6_3.1.0.5.2\Pack1of1
), and click Upgrade.
5. After firmware upgrade is completed, log in SX and check the firmware version again from:
Maintenance Æ Firmware Version. You can also check firmware upgrade history to make
sure: Maintenance Æ Firmware Upgrade History.
6. Refer to: Upgrading the DSX Firmware
section in Chapter 10 for details.
Case 2. Configuring and Using Direct Port Access via SSH
1. Purpose: To allow users to directly SSH into the serial target without using DSX GUI.
2. User may determine an IP address or TCP port on SX IP to use for DPA or any port on SX.
Since network administrator has no spare IP address, we will reuse SX IP address with
different port.
3. Log back in SX, and select the port enabled for DPA on Setup Æ Port Configuration.
4. Edit the DPA SSH TCP Port to which SSH client will connect, and then click OK.
5. Log in SX through a web browser. On Setup Æ Services page, select TCP port on Direct Port
Access Mode, and then click OK.
6. Launch the SSH client, such as Plink or PuTTY. Enter the IP address and change the default
TCP Port to connect to the port enabled (e.g.
plink -ssh -P 2203 192.168.51.9).
7. Refer to: Direct Port Access section in Chapter 7 for details.
Case 3. Using Exclusive Write Access via RSC
1. Purpose: To ensure that you are the only user who has write access to a serial target.
2. After logging in SX via a web browser, “Port Access” tab is selected by default.
3. Connect to a Port 4 by clicking on the hyperlink labled “Port 4”.
4. Then, the Raritan Serial Console (RSC) application window launches with Write Access
enabled (icon indicated in green on status line at the bottom of the window), unless the port
has been occupied by another user.
5. In the RSC window, select Emulator Æ Get Write Lock (If some other user has previously
obtained Write Access, please perform “Get Write Access” first from the Emulator menu of


