CHAPTER 3: INITIAL SOFTWARE CONFIGURATION 13
Network Configuration
1. Click Network in the Configuration section of the Setup screen. The Network Configuration
Screen appears.
Note: If you have a dual LAN model, there is an Eth Failover checkbox that is selected by
default, but can be turned off. The screen below represents a single LAN model and does not
show this checkbox.
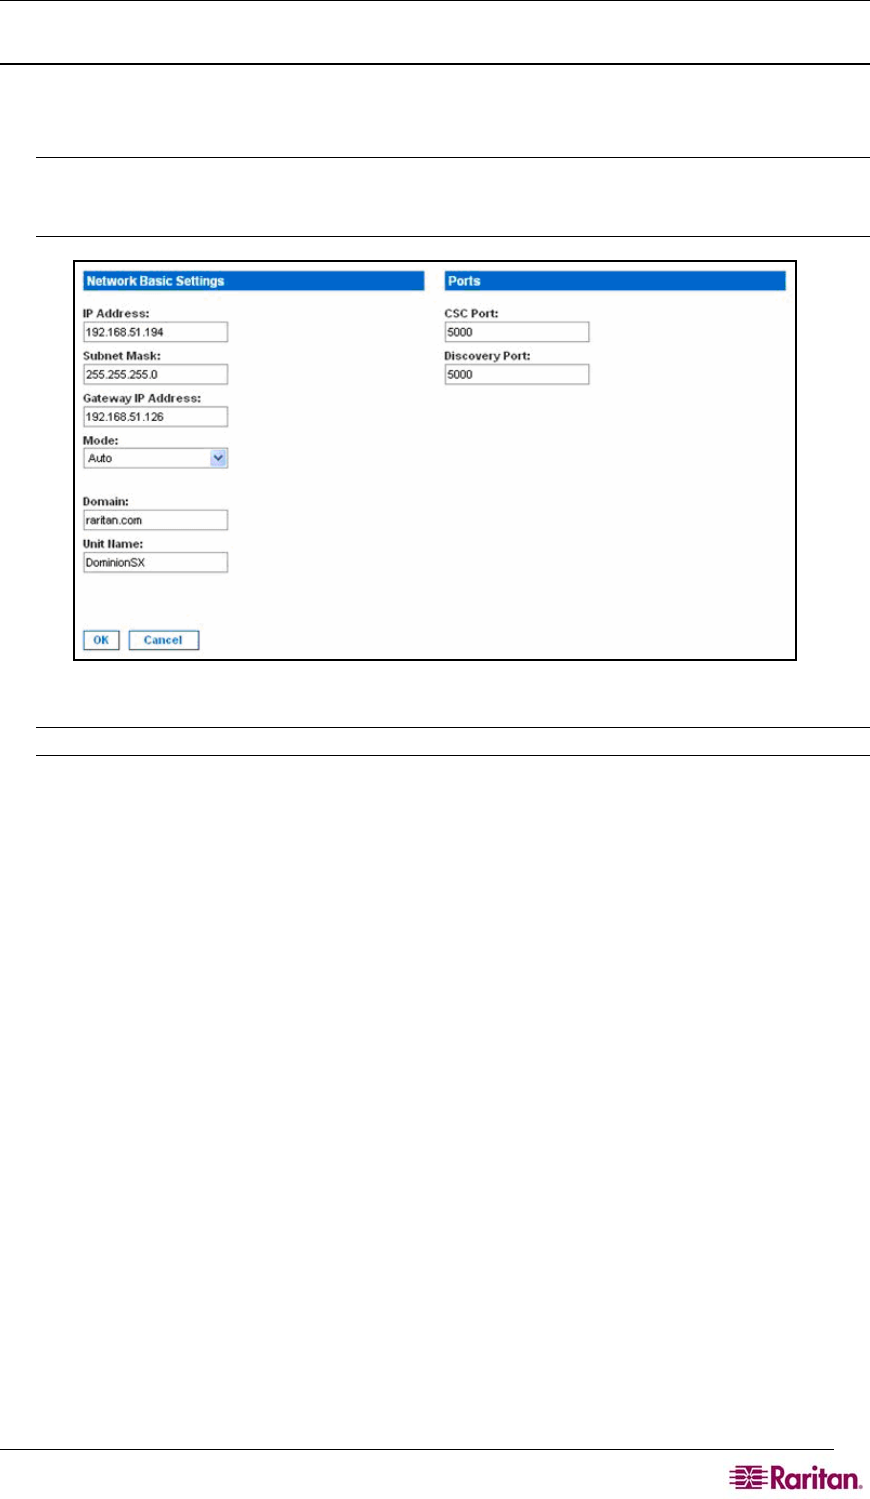
Figure 11 Network Configuration Screen
Note: Your network administrator usually assigns the values for the following parameters:
2. Type the data in the following fields:
• IP Address: Network address for this unit
• Subnet Mask: Subnet mask for the network where this unit will reside
• Gateway IP Gateway: Default gateway for this unit
3. Select the Mode from the Mode drop-down menu.
4. Type the Domain Name in the Domain field.
5. Type your Unit Name in the Unit Name field.
6. In the Ports section:
• Type 5000 or another port number in the CSC Port field.
• Type 5000 or another port number in the Discovery Port field.
7. Click OK.
Dominion SX displays either a confirmation or error screen.
1. Click OK when the confirmation window appears. After the confirmation screen, Dominion
SX automatically disconnects to update the configuration then restarts.
2. Remove the crossover cable between the SX unit and your computer.
3. Connect one end of a straight-through Cat 5 cable to the SX.
4. Connect the other end of the cable to the network.
5. Use the newly assigned IP Address to access your SX unit.
