


66 DOMINION SX USER GUIDE
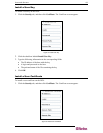
Enabling Client Certificate Authentication:
To enable Client Certificate Authentication:
1. Click Enable SSL Client Certification.
2. Click OK to enable the Client Certificate authentication.
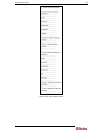
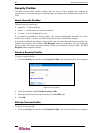
Installing a New Trusted Certificate Authority
To install a new trusted Certificate Authority (CA) to the DSX, the CA certificate must be on an
accessible FTP server.
1. Click Install Certificate Authority.
2. Fill in the data needed to retrieve the certificate from the FTP server.
3. Click OK to retrieve and install the CA certificate to the DSX.
Removing a User-Added Certificate Authority
To remove a user-added CA from the DSX:
1. Click Remove Certificate Authority.
2. In the CA Name field, type the name that was specified when the CA certificate was
added.
3. Click OK to remove the certificate.
Viewing a Certificate Authority
To view a CA:
1. Click View Certificate Authority.
2. In the CA Name field, type the name of the CA you want to view.
3. Click OK to retrieve the list of CAs.
Managing the Client Certificate Revocation List (CRL)
The DSX comes with VeriSign and Thawte CA certificates and CRLs preinstalled. If a user adds
a custom CA to the DSX, a corresponding CRL should be added to keep track of revoked
certificates. For the CRL to be automatically retrieved when expired, it should be retrievable from
a web server that the DSX can connect to.
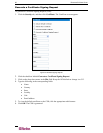
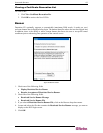
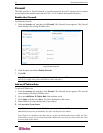
Adding a New Certificate Revocation List to the DSX
To add a new CRL to the DSX, the CRL list must be on an accessible FTP server.
1. Click Add Certificate Revocation List.
2. Fill in the fields to access the FTP Server.
• The CRL Name field should match the name that was used to add the CA.
• The URL field should be the numeric dot notation of the IP address of the HTTP
server.
3. Click OK to add the CRL.
Deleting a Certificate Revocation List from the DSX
To delete a CRL from the SX:
1. Click Delete Certificate Revocation List.
2. In the CRL Name field, type the name of the CA this CRL belongs to.
3. Click OK to delete the CRL.