6 DOMINION SX USER GUIDE
Hardware Installation
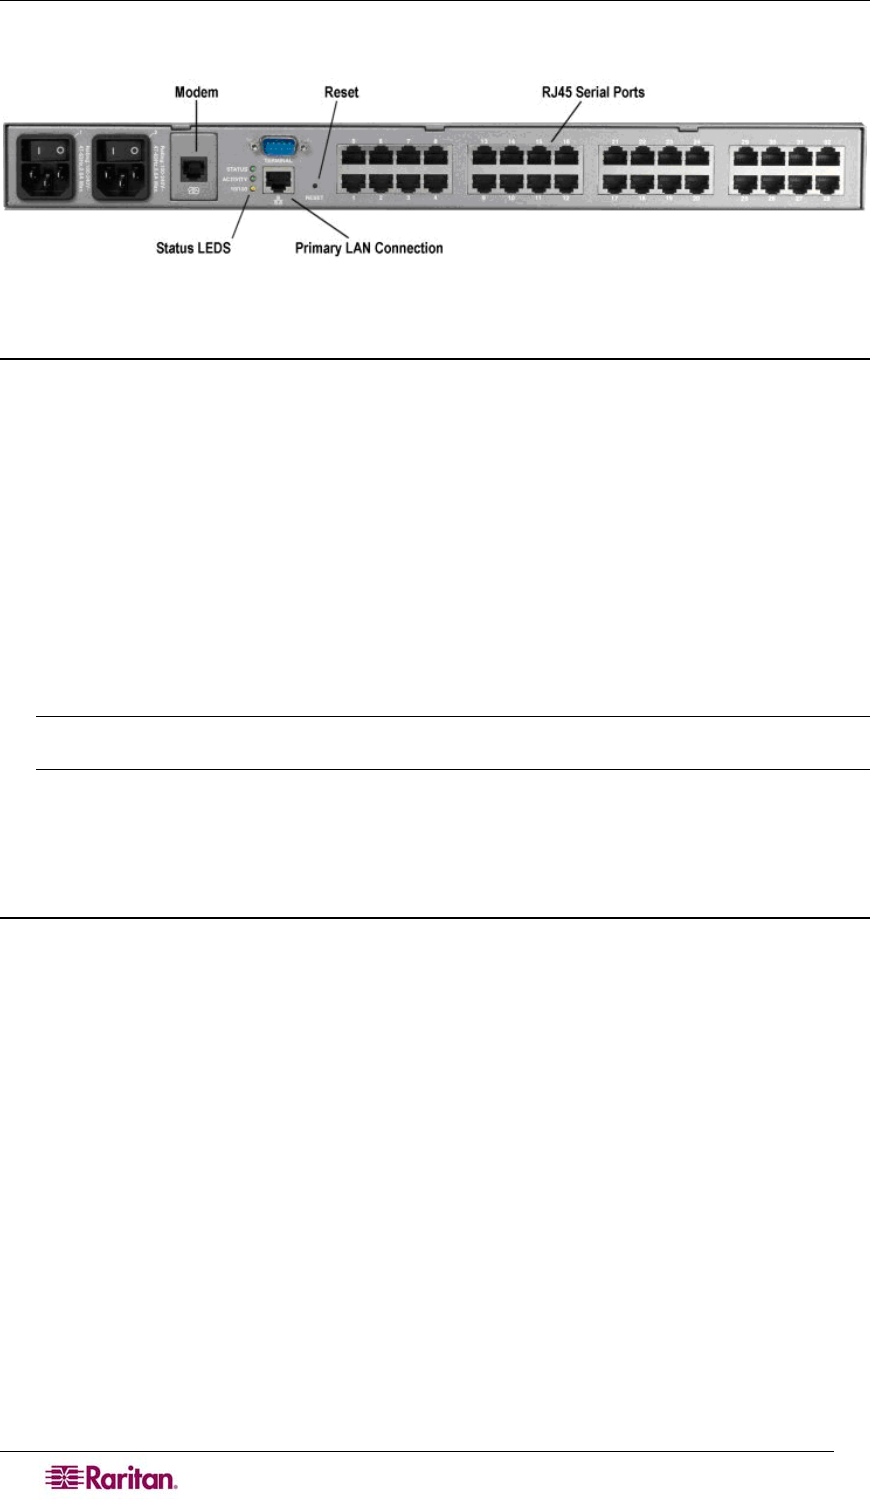
Figure 2 Rear Panel of the DSXA-32
Physical Installation of Dominion SX for Initial Configuration
1. Use a computer with a network card and crossover network cable. This computer will be
referred to as the ‘installation computer.’
2. Physically mount the unit in an ergonomically sound manner. The unit is designed to be
easily rack-mounted, and rack mounting is recommended.
3. Connect the crossover network LAN cable to the primary LAN connection (LAN 1 on
models with two Ethernet interfaces) on the back of the chassis.
4. Connect the other end of the network LAN cable to the network card in the installation
computer.
5. Connect the female end of the external power cord to the back of the chassis.
6. Connect the male end of the external power cord to the power supply outlet.
7. Power ON the Dominion SX unit.
Note: The unit will perform a hardware and firmware self-test then start the software boot
sequence, which takes a short time and is complete when the light turns on and remains on.
After completion of the hardware and firmware self-test and the software boot sequence, perform
the initial configuration tasks using the Graphical User Interface (GUI) or the Command
Language Interface (CLI) as described in the following sections.
LED State
On the front panel of the Dominion SX unit, there exists a LED indicator right next to the model
name label. The LED indicator will blink blue in the following three cases:
1. Ethernet packets are received or transmitted.
2. Serial data are received or transmitted.
3. When watchdog timer is reset to 0. The LED blinks on a periodic basis as the watchdog
timer reaches a certain value, and then is reset to 0.
