


. . . . . . . . . . . . . . . . . . . . . . . . . . . . .
5-16 Preparing for Use with PC
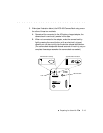
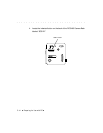
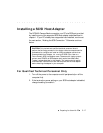
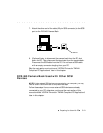
6. While “SCSI” still appears on the LCD, you change the current SCSI
ID by pressing the SCSI ID button repeatedly. The ID rotates through
the values 0 to 7, “PC,” and “PP.” Stop when you have the SCSI ID
you want.
IMPORTANT: Do not use a number currently assigned to any other con-
nected SCSI device. Do not assign the number used by your SCSI host
adapter. (Refer to “Making the SCSI Connection” later in this chapter if you
are uncertain about the adapter.) Consult your SCSI host adapter manual to
see if other SCSI IDs should not be used — for example do not use numbers 6
or 7 if you are using a Future Domain SCSI Host Adapter card.
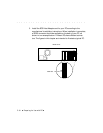
A DCS 465 Camera Back set to a SCSI ID currently in use by another con-
nected SCSI device may not respond to the PC; instead, the DCS 465 Camera
Back will flash the SCSI indicator on the camera back LCD. If this occurs,
reset the SCSI ID on the DCS 465 Camera Back as described in this section,
and try again.
“PC” SETTING FOR LAPTOP CUSTOMERS: Use the “PC” SCSI ID setting
only if you will be connecting the camera back to a laptop computer using a
PCMCIA-to-SCSI II adapter (such as the New Media Bus Toaster), to connect
the PCMCIA slot on your laptop (not the camera back) to the SCSI connector
on the camera back. “PC” sets the SCSI ID of the camera back to 1 and turns
on active termination in the camera back.
(Later, when laptop users install and access the software driver, you should
use the Kodak TWAIN ASPI driver.)
When you finish with the camera back in “PC” mode, take the camera back
out of “PC” mode, turn off the computer and camera back. If left in “PC”
mode, a fully charged battery will be exhausted in approximately eight hours
since the camera back can not change to low power mode when this SCSI
setting is active.
“PP” SETTING: the “PP” setting, although it appears, is not currently sup-
ported and should not be selected.