


. . . . . . . . . . . . . . . . . . . . . . . . . . . . .
6-8 Using the DCS 465 Camera Back
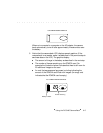
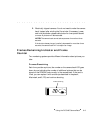
3. Press the ISO button once with your fingertip or other blunt object;
this action wakes ISO mode. The characters “ISO” appear on the
camera back LCD as does the current ISO.
4. While “ISO” still appears on the LCD, press the ISO button again. The
ISO indicator cycles to the next supported ISO. A color camera back
supports an ISO setting of 80 and a monochrome camera back
supports a setting of 160.
5. (Optional) Press the ISO button again — repeatedly if you wish —
until the desired supported ISO is selected.
6. Set the ISO on your camera to match the ISO on the camera back.
Taking Pictures
1. If it is not awake, wake the camera back as described earlier in this
chapter.
2. Frame the scene as you would if you were using film.
3. Focus.
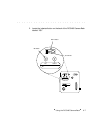
4. Release the shutter as described in either part A or B below. The
camera back supports a two-image burst.
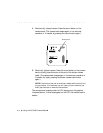
A. Mechanically tripped camera. Wake the camera back if neces-
sary, wind the film winder, and press the cable release button. A
picture will be recorded.
NOTES: Your cable release (not supplied) must have a “throw” of at
least 5⁄8-inch in order to extend far enough into the camera trigger
module to trip the camera. The throw is the distance the pin extends
from the end of the cable release when you fully depress the cable
release button.
The camera back cannot take exposures of more than three seconds.
If the shutter release plunger is
partially
depressed for more than three
seconds, the camera back will not capture an image.