


34
35
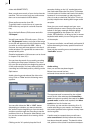
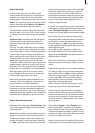
Step 2: Recording
In the audio section go to the Record, Edit
screen. At the above-right you can specify the
input for your audio source. You can choose
several options, depending on the audio source.
Note: If you connect a mono microphone keep in
mind to select the option Mono under Mode so
that you can still hear the sound in stereo.
You need some music to add to the video men-
tioned in step 1 (e.g. from a CD or from a music
TV channel), and you need several commentari-
es.
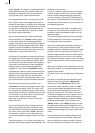
Important note: Important note: Do not set the
volume levels for your audio recordings too
high (the audio level meter should not hit the
red area!)
If you do very little audio work, use the yellow
area of the meter so that quality does not suffer
and so that audio is not too soft during playback.
If you are planning on doing a lot of audio mix
work, make sure to set the meter to a low level.
Over-modulation can occur even if two audio
tracks both use the yellow level of the meter.
The audio volume meter has a peak display. The
highest value is shown for a short time using a
little mark. This way, even short level peaks can
be seen and over-modulation can be prevented.
Although lowering the level can later reduce
over-modulation, it is far easier to monitor the
volume levels even before recording.
Now record the audio segments and the com-
mentaries. Give the segments names, as you
have already done in earlier exercises.
You will want to trim the music recording at the
beginning and the end because the starting ti-
mes of the music source (e.g. from radio) and of
recording will almost certainly not be exactly the
same. Do this as described in the rst tutorial.
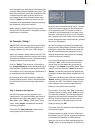
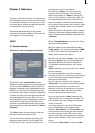
Step 3: Placement and mixing
Afterward call up the menu "Audio mixing". Here
you will arrange and digitally mix the recorded
audio segments.
Select the rst scene in the storyboard so that it
appears in the center. Then select the (rst) mu-
sic track by clicking on either the musical-note
symbol or directly on the track itself. Now click
on "Add", select the music piece from the audio
sample list that appears, and conrm with "OK".
In case the music piece is too long in spite of
trimming and the end of the audio track lies
beyond the storyboard, simply shorten the end
of the audio scene: go back to the Record, Edit
screen and trim the music segment or trim it
using the Range function.
If you are not certain how long your storyboard
is altogether (including effects), then simply look
under "Storyboard length" in the Finish menu.
Shorten your music segment to the same length.
If the music piece is too short to ll the entire
storyboard, either select the scene in which the
music ends, or select the music directly, and
then click again on "Add". The audio recording
is now repeated starting exactly where the rst
music segment ends.
(Of course, it is also possible to replace mu-
sic scenes. Simply click on the inserted music
segment, select "Remove" and add, as above, a
different piece of music.)
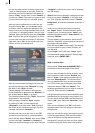
Now we can insert the commentaries. Click on
the second track (commentary track) to make it
active.
Now look for the scene in the storyboard where
you want to insert your commentary and put it
in the center. Click on "Add" and then select the
rst commentary sample in the audio list and
conrm with "OK". The commentary sample
then appears on the commentary track at the
beginning of the selected scene.
Now we come to the ne adjustments – to the
proper placing of the commentary sample.
At rst, play the video from the commentary
position (click the Play symbol to the left of the
storyboard scroll bar). You should see the video
and hear the commentary. You can also obser-
ve the volume level displayed within the audio
sample graphic.
Then click on "Range", select "Position", and
shift the Start point, so that the commentary
begins earlier or later. Scroll to the ideal positi-
on and check again by replaying. When you are
satised with the commentary placement, return
to the menu Audio mix screen.
Now it is time for the rst creation! Click on the
commentary in the commentary track and then