


38
39
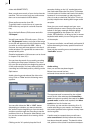
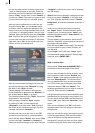
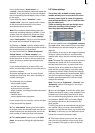
can see the video screen in the top right corner
– with an enlarged part of your title. In the top
left corner, you can rst decide if the letters ap-
pear as “Color” (single color) or as a "Pattern". If
you choose “Color”, the color box opens so that
you can choose the color, for example yellow.
After you have conrmed your color box set-
tings by clicking "OK", you can decide to add
an outline. You can dene the strength of the
letters’ outline by moving the slider next to it (0
= no frame, 6 = strongest outline). Set it to 4 for
example. Now you can click onto the “Color/Pat-
tern” button to call up the imagepool, in which
you can click onto the color button in the lower
right area (left to "Ok") to call up the color box.
Choose a color, for example red.
After you have closed the image pool you can
specify the intensity of the "Shadow" by using
the slider in the "Style" window.
Choose setting 6 for instance. Now use the
arrow directions to determine the "Direction" of
the shadow and its "Color", e.g. black.
The remaining buttons in the “Style” screen can
be ignored for this example
After you have closed the "Style" window
by clicking on "Ok", you can specify the
"Alignment" of the text under "Line".You have
the choice of left, centered, and right. For this
example it should be "centered".
You exit text entry by a nal click on the "TE"
symbol and you can call up a new operations
panel with the button "Boxes". Here under "Text"
you can use "top", "centered" or "bottom" to
place your text accordingly on the page. Choose
“Centered” and close the menu bar by pressing
the "TE" button.
Note: If the text box displays a background, then
click on the button "Graphics" in the main task
bar. Then click the checkmark next to "Choose
background", so that the checkmark turns into a
hyphen.
Now you can add another page by pressing
the “Pages” button. Another operation panel
appears. Here, you should press “Insert” and
answer the posed question “Insert where?” by
selecting “Behind”.
The top display of the operation panel should
now say “Page 2/2” meaning that the second of
two pages has been added.
Enter the word "with" on this page. The settings
you have made for color, frame, position, etc.
are still valid.
In the "Pages" menu click onto “Insert” again
and add another page (the third). On this page,
enter the word “SMART EDIT”.
Step 2: Archive titles
Now the text "Video title with SMART EDIT" is
contained on the three pages of the scene.
You can save this text for future projects. In the
main operation panel, click on "Archive" and
then on "Save". A list appears containing only
the word "MacroSystem". This demo text is a
short, predened text that we have provided
you. Click on the gray rectangular name eld
(above the buttons "OK" and "Cancel"). The
keyboard appears and you can enter a name for
your title. Enter the name "exercise".
Using the archive you can save frequently used
standard text for future use in any project. Con-
rm the name change ("OK") and then the save
action ("OK"), after which the "Save text” menu
closes.
After you are nished, click "OK" in the main
operation panel. You are returned to the main
titling screen.
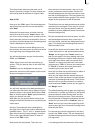
Here you can set the range, (the beginning and
end of text appearance). Click on the duration
value to the left of the Play button under the
storyboard. Currently, the title you have added
is visible during the entire scene with gradual