


44
45
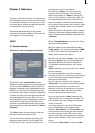
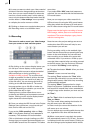
If you set the button “Audio tracks” to
“normal”, then the buttons positioned below are
disabled. In the gray elds you can see whether
the corresponding soundtracks are free or xed
to the scene.
If you select the option “Selection” under
“Audio tracks”, then the original audio is xed
to the scene and the behavior of the other
soundtracks can be set at will.
Note: Some systems automatically select the
best audio sampling frequency (48 KHz). If your
system does not support this, there is a manu-
al audio selection within the "Audio settings",
called "Audio quality". Use it to avoid compatibi-
lity issues with connected DV equipment.
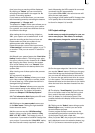
(7) Clicking on "Delete" opens a window which
offers the possibility to determine which areas of
the selected project can be deleted.
You have three options: "Delete Storyboard",
"Delete scenes" and "Delete samples". It is
possible to select two or even all three options
at the same time. A click on the box next to the
option activates or deactivates that particular
function.
If you choose all options, all data (video and
audio, and all effects) within the currently active
project are deleted.
All project settings can now be reset. Project
settings are xed only after video recording or
creation has begun.
The following are not deleted:
– other edited projects
– scenes in the clipboard
– archived colors and titles
– effect modules, including those that have been
installed later
– installed fonts
– other supplementary programs
If you choose only one function, merely this part
of the project will be deleted.
(8) The "Information" button gives information
on project name, storyboard length, scenes and
effects inserted into the storyboard, and on the
total number of existing scenes and samples.
(9) This menu symbol returns you to the Main
menu, the same as clicking the right trackball
button.
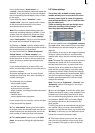
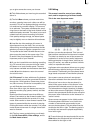
5.3 Video settings
This screen (only available on some system
models) allows you to correct the levels of the
incoming video signal (in terms of brightness,
contrast and saturation), and it is used for selec-
ting the video input.
These are settings that you can change at any
time when recording analog footage – even
after the project has been edited.
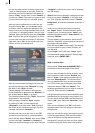
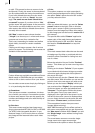
(1) You can specify here the brightness, contrast,
and color of the video material before recording.
This allows you to see the footage as it will be
digitized.
It is possible, of course, to use Image Processing
effects to make corrections to recorded video
material after input, but this involves rendering
time.
Note: The better the material has been recorded,
the better the result will be. Corrections after-
the-fact have their limits – a picture that is too
dark can never be as radiant as a picture digi-
tized with the correct lighting, even after using
brightening effects. Simply modify the settings
until you have attained the desired levels. When
your source material changes, e.g. when bad-
weather pictures appear, then you can simply
readjust the settings.
Note: The settings "Brightness", "Contrast" and
"Saturation" cannot be changed, if you chose
the input "DV".
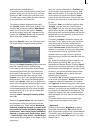
(2) You can use "Input" to switch the video input.
(Please note that DV input is only available if the
hardware you use actually features a DV port).
You can also add analog material, which is then
converted by SMART EDIT to DV data. Digital
and analog material can be combined in the
same project.
The DV input device is automatically recognized
and marked. After you have connected the DV
recorder, you see that the input, e.g. is titled with
"DV Sony". In this way you can determine quick-
ly that the connection has been made.
(3) This button allows you to move the Input
menu bar from the bottom of the screen to the
top, if needed. Click again to return to the bot-
tom.