


56
57
edition" manual, chapter 5.6 for the relevant
description. The programs "DVD-Arabesk 2" and
"DVD-Arabesk 3" come with a separate manual.
Note: The DVD-Arabesk software may differ
slightly from the description below on some
systems.
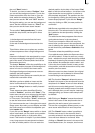
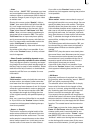
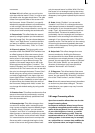
In the “Image quality” section, you may see
the “Rendering” button, which provides you
with three options, namely, “fast”, “normal”
and “intensive”. These options allow you to
inuence the picture quality of the computed
lm.
In some cases, you cannot play an inserted
DVD or a lm created using DVD Arabesk. In
that case, you can therefore ignore the playback
functions described in Chapter 3.2 of the DVD
Arabesk manual.
(9) Clicking on the menu symbol brings you
directly to the Main menu screen.
5.7 Transition effects
When your project has been completely arran-
ged in the Edit screen, and you are pleased with
the results (but with hard cuts between the
scenes), then you can apply transition effects.
Transition effects are transformations from one
scene to the next. In traditional lm editing the-
se transitions are known as A/B roll cuts.
You can carry out crossfades, wipe fades, and
color fades, but also trick transitions only pos-
sible in digital systems. The transition effects
are always inserted between two scenes in the
storyboard. Some complex transition effects
must be created. Creation can be time-consu-
ming, depending on the effect desired. For this
reason it is possible to preview the effect in a
small window. You can then "batch-render" in
the Finish menu (see 5.6, item (3): "Create").
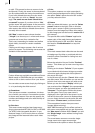
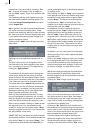
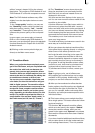
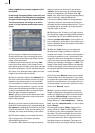
(1) The "Transitions" screen shown above dis-
plays the storyboard you are already familiar
with. But here, two scenes instead of one are
displayed in the center.
You thus see two time displays in the upper pa-
nel. You can now move the scenes meant for the
transition to the middle.
A further difference is the Play button which in
this menu only plays the effect with 1 second
before and after, and not the entire storyboard. If
you have not already inserted an effect, clicking
on this button plays the last second of the rst
scene and the rst second of the second scene.
This enables you to view hard cuts even bet-
ween very long scenes.
The slider and the arrow buttons are used in the
same way as in the Edit menu.
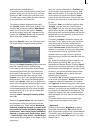
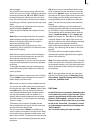
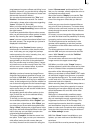
(2) You can choose the desired transition effect
in the effect list by selecting directly or using the
slider. Some of the effect symbols are mar-
ked in the list with a blue ag in the upper-left
corner. This means that the effect is real-time
affected (availability depends on system used)
and normally does not have to be rendered in
DV projects. A red ag identies a demo effect,
(real-time or not), that must be calculated and
is played with a superimposed "demo" text.
To purchase and unlock an effect, contact your
Dealer.
Note: In going to print, not all effects were
HDV capable and could therefore not be made
available in HDV projects. Additionally, in HDV
projects, no real-time effects are available.
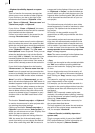
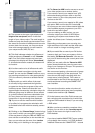
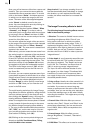
(3) After you have selected an effect that has
further options, the effect options are displayed
in the eld to the right of the effect list. There
you can, for example, dene colors and effect
directions, and other parameters specic to the
individual effects.
(4) This button allows you to switch the effect
list to single points. The button offers the follow-
ing three functions.
The function "All" shows all transition effects
which are to be found in the system. "Default"
shows the transition effects, which are inte-
grated in the system and "Optional" only shows
the transition effects which have been installed
afterwards.
If you have installed additional transition effects,
they are also shown in this list (underneath the
three settings listed above). Thus it is possible