


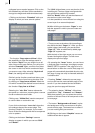

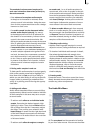


78
79
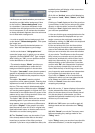
on the track itself (selected track turns blue).
• Select the scene in the storyboard approxima-
tely at which the audio sample is to begin.
• Click on the Add button and select an audio
sample from the list displayed.
• The sample now appears in the track provided
for it exactly at the beginning of the active
scene in the storyboard.
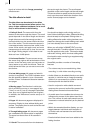
2. Moving and trimming audio samples
To dene the starting point exactly, select Range.
The Range menu is called up, with which you can
• move the sample completely (Start ; select
Position) or
• shorten the sound at the beginning or end (In
and Out ; select Trim).
The corresponding image is also displayed, and
you can also hit the Play button to play the full
segment of video with the selected sound.
3. Creating and checking audio.
• Return to the Audio-Mix menu and select Create.
• From the colour of the horizontal colour con-
trol bar between the original sound track and
the storyboard, you can ascertain whether the
overall volume of all audio samples is faultless
(blue) or over-modulated (red). Correct any
over-modulated passages with the aid of the
volume control or the wave form as described
under Point 4.
• Click on the Play symbol. The sound is now
played in mixed form with the sound from the
other scenes. The video material concerned is
played at the same time, and a volume level
indicator is displayed.
4. Adjusting the volume.
SmartEdit offers a total of three methods of
volume control:
• Direct volume control. Should one of the
samples concerned be too loud or too soft,
click on it. It is highlighted in blue. Now move
the Volume control to adjust the volume. The
volume characteristic is displayed in light blue
in the background of the audio sample. Follo-
wing recreation, you can play it back again and
correct it if necessary.
• Indirect volume control. To emphasize a particu-
lar audio sample by reducing the volume of ad-
jacent tracks, use the Correction function. Click
on the sample to be emphasized, which is then
highlighted in blue. Now use the Correction
button and the slider adjacent to it to adjust the
volume of all six tracks. This procedure modies
only the part of the adjacent sample selected
using Correction which is parallel to the selected
sample. The volume levels before and after the
selected sample remain unchanged.
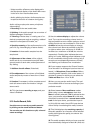
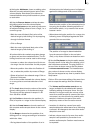
• Volume control by means of wave form.The
wave form is the tool to use to increase or
reduce the volume of an audio segment within
an audio sample, for example in order to
eliminate a loud unwanted noise. Click on the
desired audio sample to highlight it in blue,
then select the Envelop menu item. First use
Add to insert three anchor points into the volu-
me display beneath the wave form. In the area
above all soundtracks are displayed to give you
a better overview.
Then click on the leftmost of these three points
in order to activate it. The colour of the activa-
ted point changes from red to green. You can
now move it to the desired position either by
clicking on it again and dragging it with the
trackball, by means of the Position slider, or
by clicking on the Range button. Range causes
the associated video still to be displayed in the
background, enabling the position of the point
to be selected according to its position within
the video.
Place the rst point horizontally ahead of the
noise to be eliminated, without however mo-
difying the vertical position of the point. Positi-
on the second point horizontally in the middle
of the noise and drag it at the same time
vertically downwards to dampen the sound.
The third point marks the end of the noise: it
should therefore also be at the same horizontal
level as the rst, but beyond the noise. Click
on Create to reduce the volume of the noise
substantially without changing the remainder
of the audio sample.
To reduce the volume of longer ranges, use
four points and drag the middle two points
down.