


64
65
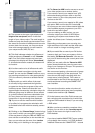
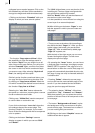
fects, you at rst insert an effect into a scene and
create it. Then you convert the scene with the
inserted effect into a separate scene. To do this
click on the button "Scene". A window appears
in which you can select the range for the new
scene. The name of the effect applied appears
under "Name" as default name for the new
scene. You can change this name by clicking on
it and calling up the keyboard.
You also have the three options "Effect", "Effect
+ Scene(s)", and "Range". In order to make a
new scene just from the effect with the previous-
ly set range, click on "Effect" and then on "OK".
The effect is turned into a scene and put into the
scene bin of the Edit menu.
You can also adjust the length of the new scene
to the range of the previous scene (with inserted
effect). In this case click on "Effect + Scene(s)"
and then on "OK". The new scene is created and
appears in the scene bin.
Alternatively, you can create the new scene from
the entire length or a segment of the storyboard.
Click on "Range", conrm with "OK", and use the
IN and OUT points in the familiar Range menu to
select the range containing the new scene. The
wave form can be of help (section 3.2) and can
be toggled on/off with the loudspeaker symbol.
Then click in the Range menu on "OK" and the
scene is created and put into the Edit menu in
the Scene Bin.
Of course, you can create a separate scene from
a storyboard segment in which there is no effect.
Simply select a scene in the storyboard and click
on "Scene". In the window displayed only the
function "Range" is active. Specify a new range
and click on "OK". Now you can view the new
scene in the Edit menu.
The multi-layering technique for Image Proces-
sing effects can also be applied by using the Edit
menu to activate a scene in the scene bin and
then clicking the "Special" button. All Image Pro-
cessing effects are listed there. The effect you
select is not applied into the storyboard. Instead
a copy is made of the active scene in the scene
bin with the Image Processing effect added to
it. The copy is then identied with the extension
"SP", "SP 2", etc., as the case may be. You can
carry out this procedure any number of times.
(See section 5.5 Editing, item (19))
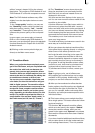
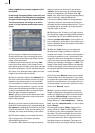
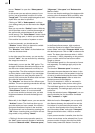
(13) Clicking on the menu symbols brings you
directly to the Edit, Transition effects, Titling,
and to the Main menu screens.
Keep in mind: If you change a setting for an ef-
fect that has already been calculated, or change
the duration, or even replace the effect with
another, the effect must then be re-created. Be
careful!
The Image Processing effects in detail
The following Image Processing effects are avai-
lable in the standard package:
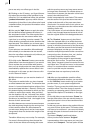
1. Binarizer: The scene is divided into two colors
according to brightness. With "Color 0" you
bring up the color box in which you select a
color that replaces the darker areas. "Color 1"
replaces the brighter areas. The "Threshold" of
the transition from light to dark can be set from
0-100%. And you can set "Transition" between
the two colors from 0-100% in order to prevent
"edge shimmer".
2. Color depth: A very frequently seen effect can
be achieved with this. The number of colors in
the picture is reduced. The "Depth" can be set
from 2-50. The "Transition" can be set from 0-
100% in order to prevent "edge shimmer".
Tip: Up to 16 million different shades of color
can appear in a video image. This allows uid
transitions. For each color component (there
are a total of three color components) there are
about 256 possible levels.
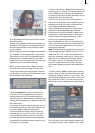
3. Color to Grey: Usually the video material is in
color. This effect can convert the video to black-
and-white. If you want to convert long seg-
ments, or perhaps even the entire video to black-
and-white, then you can set the color saturation
in the Video settings menu to 0% when initially
recording the material. This might save you long
calculation times.
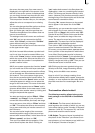
4. Control Color: With this effect you can cor-
rect the colors "Red", "Green", and "Blue" in the
scene (later adjustment). You can set the color
from 0-200%, where 100% corresponds to the
regular color.
5. Control Image: With this effect you can
change "Brightness", "Contrast", "Saturation",
and "Gamma".
6. CVBS lter: This effect can be used to reduce