


82
83
If you then trim a sample or move it, the fade in
and fade out times remain.
(13) The Effects button calls up the Audio Effects
menu. Audio effects can be applied to either a
single audio sample or a complete sound track.
• To add an audio effect to an audio sample, rst
select the desired audio sample, which is then
highlighted in blue. Then click on Effects.
• To add an audio effect to a sound track, call
up the Audio Effects menu as described under
Point (3) by means of the fx button to the left
of the sound tracks.
The audio effects are divided into several cate-
gories:
• All
All effects are displayed.
• Standard
Only the effects contained in the SmartEdit
software are displayed.
• Optional
Only the effects from any supplementary soft-
ware packages are displayed.
• [Effect package]
Only the effects from the [effect package] con-
cerned are displayed.
To combine several audio effects in a single
audio sample, use the Special item under Audio
Record, Edit.
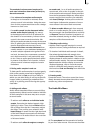
(14) The Envelop (audio wave form) of an audio
sample can be edited directly with the Rubber
Band function by means of the Envelop button.
First select the desired audio sample, after which
it is highlighted in blue. Then click on Envelop
The Envelope (Wave Form) Menu
(a) The volume of the selected audio sample is
displayed as a wave form at the top of the En-
velop window.
Above you see a representation
of all soundtracks for a better overview.
(b) The volume of the selected audio sample
can be increased or reduced selectively in the
volume display directly beneath the wave form
display by means of the rubber-band function.
In this case, rst specify the editing points within
the audio sample at which the volume is to be
increased or reduced. Insert these points either
by left-clicking in the volume display close to
the desired position, or by clicking on the Add
button beneath the volume display.
Now activate one of the new points either by
clicking on it directly, or by selecting it with the
aid of the scrollbar and the function for stepping
through individual frames on the right-hand side
beneath the volume display. The colour of the
active point changes from r
ed to green. The point can then be positioned
exactly as follows.
• Positioning in the volume display
Click on the activated (green) point again. It
changes colour from green to blue. Drag the
point horizontally to the desired time position
in the volume display. To increase or reduce
the volume, move the point upwards (louder)
or downwards (softer). Note that the rst and
last points in the volume display cannot be
moved horizontally, i.e. against time. Left-click
again to conrm the position of the point.
• Positioning by means of the Level slider
After clicking on Position, the active point can
be moved horizontally to the desired time po-
sition. Next drag the Level slider to the right to
increase the volume or to the left to reduce it.
• Positioning against the video background
To determine the position of a point according
to its location within the video, click on Range
The start position can be determined either
by Position or by stepping through individual
frames. Click on the right-hand trackball button
to adopt the selected setting. Use the Level
slider to select the volume at the desired point
in time.
Follow the same procedure with the remaining
points in the volume display until the desired
result is achieved. Then create the result.