


60
61
movement.
10. Gate: With this effect you can call up the
color box with the button "Color" in order to spe-
cify which color the gate should have. The gate
closes from opposite sides of the screen over
the rst scene. Under "Direction" you specify
whether the opposite sides are top and bottom,
or left and right. After the bars have met at
screen center, they reverse direction, moving out
of the picture and revealing the second scene.
11. Pattern fade: This effect fades the second
scene by using the pattern you have selected
from the Image Pool. You can choose between
“Wipe” and “Split Screen” to achive the ffect
you want. In addition, select the color for the
border: “None“(no border), “Soft” or “Color”.
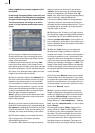
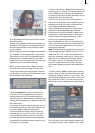
12. Picture in picture: This is not really a true
transition effect. But SMART EDIT handles it as
an effect because it affects two scenes simul-
taneously. The rst of the two scenes lls the
entire screen in the background. The second
scene is inset on it as a reduced image. The
position of the small image can be set in the
effect options with the button "Location". The
buttons "Shadow" and "Frame" are used to set a
value from 0-50. The frame color can be set with
the color box through the button "Frame Color".
Avoid using very strong colors, because this
can lead to jaggedness in the upper-right and
lower-right corners. For the picture-in-picture
effect audio is not crossfaded, as is the case with
all other effects, but instead only the audio of
the rst scene (background video) is used. You
can change this default setting by using audio
mixing.
13. Random lines: This effect transforms the rst
scene to the second by continuously covering
the rst scene with randomly positioned lines
from the second scene.
14. Rectangle wipe: This effect changes from
one scene to another with a rectangle contai-
ning a scene and which becomes steadily larger
or smaller. Under "Position" you can set the
"Location" and "Size" of a rectangle where the
sides increase or decrease in proportion to each
other. The direction can be chosen with "Mode".
"In" means that the second scene overlays the
rst scene with a rectangle that begins in the
center of the screen and grows outward until
only the second scene is visible. With "Out" the
rst scene is in a rectangle covering the screen
but which then becomes steadily smaller until it
disappears, having been replaced by the second
scene.
15. Scale: Under "Position" you can set the
"Location" and "Size" of a rectangle where the
sides always increase or decrease in proportion
to each other. If you choose the option "Grow"
under "Type", the second scene is zoomed into
the rst scene. The scene is scaled to t pro-
portionately into the rectangle and increases or
decreases in size according to the sides of the
rectangle. If you choose the option "Shrink" the
opposite occurs. The rst scene is in the rectang-
le covering the screen and gradually becomes
smaller until it disappears, having been replaced
by the second scene.
16. Stripe fade: This effect changes from one
scene to another by dividing the rst scene
into stripes which are then faded out while the
second scene can already be seen in the back-
ground. You can specify the number of "Stripes"
from 2-32. Under "Mode" you can specify the
direction of the stripes (you have the choice
between "Horizontal" and "Vertical").
17. ZI Page turn: This effect lets the rst scene
fold over like a book page, revealing the second
scene. You can specify the "Direction", the direc-
tion of the "Fixed corners", and the "Quality".
Note: Since this manual was printed, the softwa-
re version may have been changed. The stan-
dard effects in your system may vary from the
ones listed here.
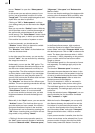
5.8 Image Processing effects
Apart from transition effects there are also the
Image Processing effects.
In contrast to transition effects, Image Proces-
sing effects are applied to entire scenes or seg-
ments of the storyboard. You can make a part
of your video brighter or invert it, or convert
it into a charcoal drawing or relief. These are
sometimes referred to as "lters" in old analog
editing systems. In the same way, for example,
as a yellow lter on a camera lens modies the
color of pictures taken, an Image Processing