


50
51
with the button located above it.
To the right of the preview buttons is the scene
duration, which you can set for up to 1 minute.
Clicking on "OK" returns you to the Edit menu.
The new scene, (named after the effect chosen),
is now available in the Scene bin.
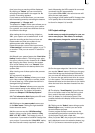
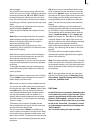
The selection button displayed underneath
the "Preview" button offers three settings. The
function "All" shows all possible "New scenes",
which can be found in the system. "Default"
shows the scenes, which are integrated in the
system and "Optional" shows only the scenes,
which have been installed afterwards.
(19) In the "Special" menu you nd various spe-
cial effects and all image processing effects.
Listing of all Image Processing effects under this
item has a special reason: multi-layering.
If you want to edit a scene with several Image
Processing effects then you must rst activa-
te the scene in the scene bin. Then select the
Image Processing effect from the list in the
"Special" menu, (not in the Image Processing
effects screen). The Image Processing effects
listed in the "Special” menu are not applied to a
scene in the storyboard, instead a copy is made
of the active scene in the scene bin. The copy
incorporates the effect, and its name is supple-
mented with SP, SP 2, etc. You can repeat this
procedure at will.
(see also section 5.8 Image Processing effects,
item (12))
Some of the special effects (the ones listed in
the upper part of the list—above the line) are
only available here. These include: Backwards,
Clipboard (availability depends on system used),
Copy, Ethernet-Transfer (availability depends on
system used), Jitter, Photo-Transfer (availability
depends on system used), Quick motion, Scene
--> audio Sample, Slow motion, and Still Scene.
These effects do not appear in the Image Proces-
sing screen.
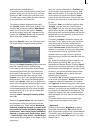
Here, too, several effects have a "Preview" and
(if your system supports this function) a "Full
Size" preview option. To the right you nd the
effect options, to the left you see the "Frame"
button under the effect name. You use this but-
ton to set the exact frame of the scene you want
to view.
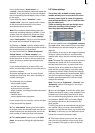
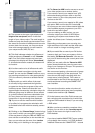
The button "View" provides four options. With
"Original" you can view your original scene,
with "Effect" you can view your scene with the
special effect applied, and "Orig. + Effect" puts
the original scene on the left screen half and the
applied effect on the right half, so that you can
directly compare them.
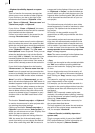
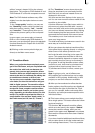
The option "Compare" divides the screen into
two parts. To the right you see your new scene
(with effect) and to the left a scene that you
can freely choose from the scene bin using the
button "Choose scene" positioned below. This
enables, for example, an exact color adjustment.
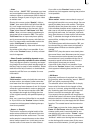
The effect options can be set directly in this
window. You’ll even get a real-time preview
without having to conrm the selection with the
slider.
You accept the settings you have made for the
effect options by clicking "OK" and you are
returned to the Special screen. Clicking "Cancel"
returns you from the full-size menu, but without
accepting any new settings you may have made.
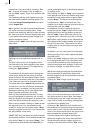
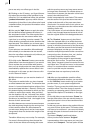
Further on you’ll see a selection button under-
neath the "Preview" button, which offers the
following three functions:
The function "All" shows all programs which are
to be found in the system. "Default" shows the
programs, which are integrated in the system
and "Optional" shows the programs, which have
been installed separately only, e.g. the additional
software. You also have the possibility to let just
one program be displayed in the effect list. This
function is helpful if you have installed several
effect packages, but only want to work with one
at a time.
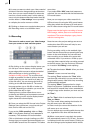
The arrow buttons serve to move the single-
image menu to the upper screen edge.
– Backwards
Clicking on the button "Backwards" creates a
scene with the extension "RW" which has the
same length as the original, but runs backwards.
The audio is also run backward. You can mute
the audio in the "Audio Mix" screen if you don't
want to hear it.