


58
59
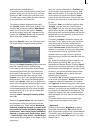
the screen into two parts. Your new scene is
displayed in the right half of the screen. In the
left half of the screen a scene is displayed that
you can freely choose from the scene bin with
the button "Choose scene" positioned below.
This comparison function lets you, for example,
adjust the color to correspond to an existing
scene.
You can also change the effect options to direct-
ly compare different colors or directions.
Here you’ll also get a real-time preview, too.
Therefore the selection of the sliders does not
have to be conrmed.
The settings made in this menu are conrmed
with "OK" and you are returned to the Edit
menu. With "Cancel" you leave the "Full Size"
menu without saving any changes.
The arrow button serves to move the menu bar
to the upper screen edge.
(11) If the inserted effect shows a symbol outli-
ned in red, then it must be created. When you
click on the "Create" button a screen appears in
which the course of the effect can be seen as it
is created. After the creation is completed the
symbol's outline is blue.
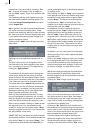
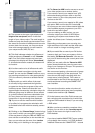
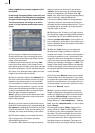
(12) If your system supports the function "scene"
you can make use of the multi-layer technique.
If you want to overlap several transition effects,
you at rst add one effect between two scenes
and create it. Then you create a single scene
from the two scenes and the inserted effect. To
do this you click on the "Scene" button so that
a window appears in which you can select the
range for the new scene. The name of the used
transition effect appears next to "Name" and is
given as default name for the new scene. If desi-
red, you can enter another name by clicking and
using the keyboard that appears.
You also see the three options "Effect", "Effect
+ scene(s)", and "Range". If you only want to
convert the effect with the previously set range
into a new scene, then click on "Effect" and then
on "OK". This causes the effect to be converted
into a scene and to be put into the scene bin of
the Edit menu.
You can also let the length of the new scene
extend beyond the range of the two previous
scenes (with inserted effect). In this case click on
"Effect + scene(s)" and then on "OK".
Then you’ll be asked with the question, if the
scene should replace the effect. Clicking on
"yes" makes both scenes in the Storyboard be
replaced by a new one, containing the inserted
effect. This change can be seen directly in this
menu. (However, this function cannot be used if
the beginning of the rst and the end of the last
scene features a transition effect).
Choosing "No" causes the scene to be created
and to appear in the scene bin of the "Edit"
menu.
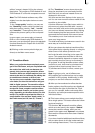
Alternatively, you can create the scene from the
entire length of or from a portion of the story-
board. Click on "Range" and conrm with "OK".
Use the IN and OUT points (in the now familiar
Range menu) to select the range of the new
scene. The wave form can help you to do this
(section 3.3). The wave form can be displayed/
hidden with the loudspeaker symbol.
Then click on "OK" in the Range menu and the
scene is created and stored in the Edit menu.
Of course, you can also create a separate scene
from a portion of the storyboard in which there
is no effect. Simply select a point in the story-
board and click on "Scene". In the window that is
displayed only the function "Range" is enabled.
Specify a range and click on "OK". Then you can
view the new scene in the Edit menu.
(13) Clicking on the menu symbols brings you
directly to the Edit, Image Processing effects,
Titling, and to the Main menu screens.
Keep in mind: If you change a setting for an
effect that has already been created, change the
duration, or even replace the effect with another,
the effect must then be created again. Be care-
ful!
The transition effects in detail
The following transition effects belong to the
basic package on the CD/DVD or SmartMedia
card.
1. 3D Mosaic: The rst scene is divided into
small squares, the number of which you can set
in the effect options under "Number of Squares"
(between 1 and 15). The squares "y" out of the
picture and reveal the second scene.
2. 3D Stripes: The second scene is pushed into
the picture in the "Direction" you choose (from
top to bottom, or from bottom to top) with from
2 to 30 stripes ("Number of stripes").