


60
61
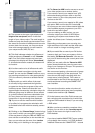
3. Bars: The new picture either pushes ("Type"
"Push") the old with from 2 to 200 "Bars" out
of view or superimposes itself ("Type" "Inset").
Under "Direction" you have a choice of six. Two
are interlocked (come from two sides). Recom-
mended duration: 0.5 to 2 seconds.
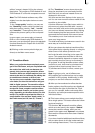
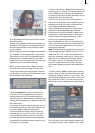
4. Blue box: With this effect you can remove
undesirable elements from a foreground scene
and place the remaining motif on another back-
ground. (This is also commonly called a "chro-
ma-key" effect) You are probably familiar with
this effect, it is used by weather forecasters on
television. The speaker actually stands in front
of a blue wall and is projected onto the weather
map.
The background scene can be any motif. The
foreground scene, located in the storyboard di-
rectly after the background scene, should show
an object (thing or person) in front of a sing-
le-colored (blue is very suitable) background.
You can choose any color, but avoid using pale
colors, black, or white.
With "Color Choice" you can set the largest
possible box that denes the color range of the
foreground scene to be masked.
In case the (blue) surface of the foreground
scene (because of illumination) is not completely
single-colored, then you can use "Color span" to
set the range in percent that the color may devi-
ate from the selected box ("Color choice").
If you click "Include area", the foreground scene
appears, but with the help of a box you select
here the portion of the background scene to be
used for this effect. If you want to see your ob-
ject in front of the entire background, set the box
to be as large as possible.
The "Exclude Area" button species the portion
of the background that should remain in a single
color. If you don't want to use this portion in
your video material, then make the box smaller
and move it out of the picture.
Keep in mind before calculating to adjust the
running time of the effect to the duration of both
scenes by using the button "x s". Ideally, both
scenes will be the same length.
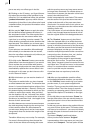
5. Circle wipe: This effect changes from one
scene to another with a circle containing a scene
and which becomes steadily larger or smaller.
The direction can be chosen with "Mode". "In"
means that the second scene overlays the rst
scene with a circle that begins in the center of
the screen and grows outward until only the
second scene is visible.
With "Out" the rst scene is in a circle covering
the screen but which then becomes steadily
smaller until it disappears, having been replaced
by the second scene. The well-known end to car-
toon lms can be replicated by using the "Black"
effect from the "New scene" list and the mode
"Out".
6. Color fade: With this effect the rst scene fa-
des into a speciable color and from there fades
into the second scene. Such a fade is popular,
for example, with edited interviews, where a
hard cut or other transition emphasizes the
participant's movement. The usual color box is
used here to set the "Color". For this effect black
or white is the usual choice.
7. Crossfade: This effect is the classical fade.
Next to the hard cut, this is certainly the most
frequently used type of scene transition. The
rst scene is transformed gradually into the
second, whereby with increasing time the rst
scene becomes less and less visible and the
second more and more. As with all transition
effects both scenes remain in movement. Simply
freezing a scene is not attractive and is no longer
supported by SMART EDIT.
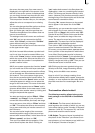
8. Double exposure: This effect is the classical
double exposure as it has been used in lm
for the last hundred years, and leads to a very
atmospheric picture transition. In essence, it is
an extended fade. With "Mode" you can choose
between "Crossfade" (normal usage) and "Fade
In/Out" (recommended for inserts). The "Fade
time" (sum of fade-in and fade-out) can be set
for up to 12 seconds. Under "Mix" you can set
the proportion of the scenes involved up to
100%. If the control for the mix proportion is set
to 0%, then the rst scene is shown in full. For
100% you see only the second scene. With 50%
both scenes are shown with the same intensity.
This is suitable for normal transitions. Don't for-
get to specify the duration of the effect with the
corresponding buttons. You will usually use the
"x s" button to set the duration to the maximum
so that the transition takes effect throughout the
entire double scene. For this case you should
trim both scenes to the same length beforehand.
9. Field changer: The scenes in this effect are
alternated in half images with each other so that
a strobing effect ensues keeping both scenes in