


86
VGA 2 (800 x 600, 75 Hz):
If your VGA monitor supports this setting then
you can also use it with SMART EDIT. The only
difference to the setting above is the frequency.
The picture ickers less.
VGA 3 (1024 x 768, 70 Hz):
This setting also enables rendering of more
scenes and entries. In addition, icker is as little
as with VGA 2.
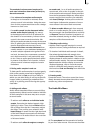
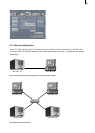
6.2 Single-monitor use (VGA as an alter-
native)
Instead of using a television you can use the
VGA port to connect a computer monitor (also a
at screen). However, you cannot run the system
with both screens at the same time in single-
monitor-use.
A VGA monitor will provide a calmer picture of
the menus and video footage.
You must adjust the “Screen” setting
accordingly in the “System settings” menu to
the desired VGA mode. You can choose from
several VGA options. Some examples:
VGA 1 (800 x 600, 60 Hz)
VGA 2 (800 x 600, 75 Hz)
VGA 3 (1024 x 768, 60 Hz)
VGA 4 (1024 x 768, 75 Hz)
But take caution: If you want to use a VGA
monitor, you must connect both a television
and a VGA monitor to the system when you
start up the system for the rst time! Once you
have started the system, you will see the menu
displayed on the television. After you set the
“Screen” button to the desired VGA mode, the
system restarts automatically and then displays
the user interface on the VGA monitor. You can
now disconnect the television from the system
– the television was only needed in order to start
up the system the rst time.
A few limitations apply when running the
system with a VGA monitor but these are not
relevant to the nal results of the lm. In the
following we would like to give you a few tips on
how to work with VGA mode.
• Since the screen refresh rate of a VGA monitor
is not the same as a television’s refresh rate (50
Hz), the video footage will appear jerky when
played – though this of course has no effect on
the video output via the DV interface. If your
VGA monitor supports a frequency of 75 Hz, we
recommend you use a VGA resolution of 2 or
4 for PAL in order to minimize picture jerkiness
during playback. For NTSC, we recommend you
use the 60 Hz modes, VGA 1 or VGA 3.
• Compared to video mode, VGA mode handles
complete pictures (non-interlaced). This results
in a comb effect appearing on moving objects
(e.g. camera sweeps or cars driving by) so that
the edges no longer look sharp (fringed). This
limitation is of course only of relevance when
displaying footage on a VGA monitor and is not
included in the actual video itself.
To change this, go to the "System Settings",
press the "Screen" button and select the "Field"
option. This way, playback is exempt from
artefacts.
• The color saturation and contrast properties of
the picture displayed on a VGA monitor are very
weak but they are displayed correctly in “Video”
mode (television). Therefore, please avoid
increasing the saturation or contrast since this
could lead to color bleed or distortion that is not
visible on the VGA monitor.
The picture sharpness is also displayed
differently in VGA mode than it appears in the
nal video. After you nish editing the video, we
recommend you check the saturation, contrast
and picture sharpness of the footage on a
television in video mode.
• The entire video picture including the overscan
area is displayed when working with various
menus in VGA mode (e.g. when playing,
trimming or splitting a video). This area
sometimes contains image distortion that is no
longer visible when the video is later exported
or viewed on the television. When you are
positioning titles, we therefore recommend you
do not place them too far into the area around
the edges of the picture or else the letters
will no longer be visible later on. In any case,
please make sure you carry out a nal check by
watching the video footage on a television.