EPSON Stylus Pro 7000 Revision B
Disassembly & Assembly Disassembly Flow 148
4.2.3.16 Removing the Pump Assembly
1. Remove the Maintenance Assembly as described in “Removing the
Maintenance Assembly” on page 143.
2. Remove the Cap Assembly as described in “Removing the Cap
Assembly” on page 147.
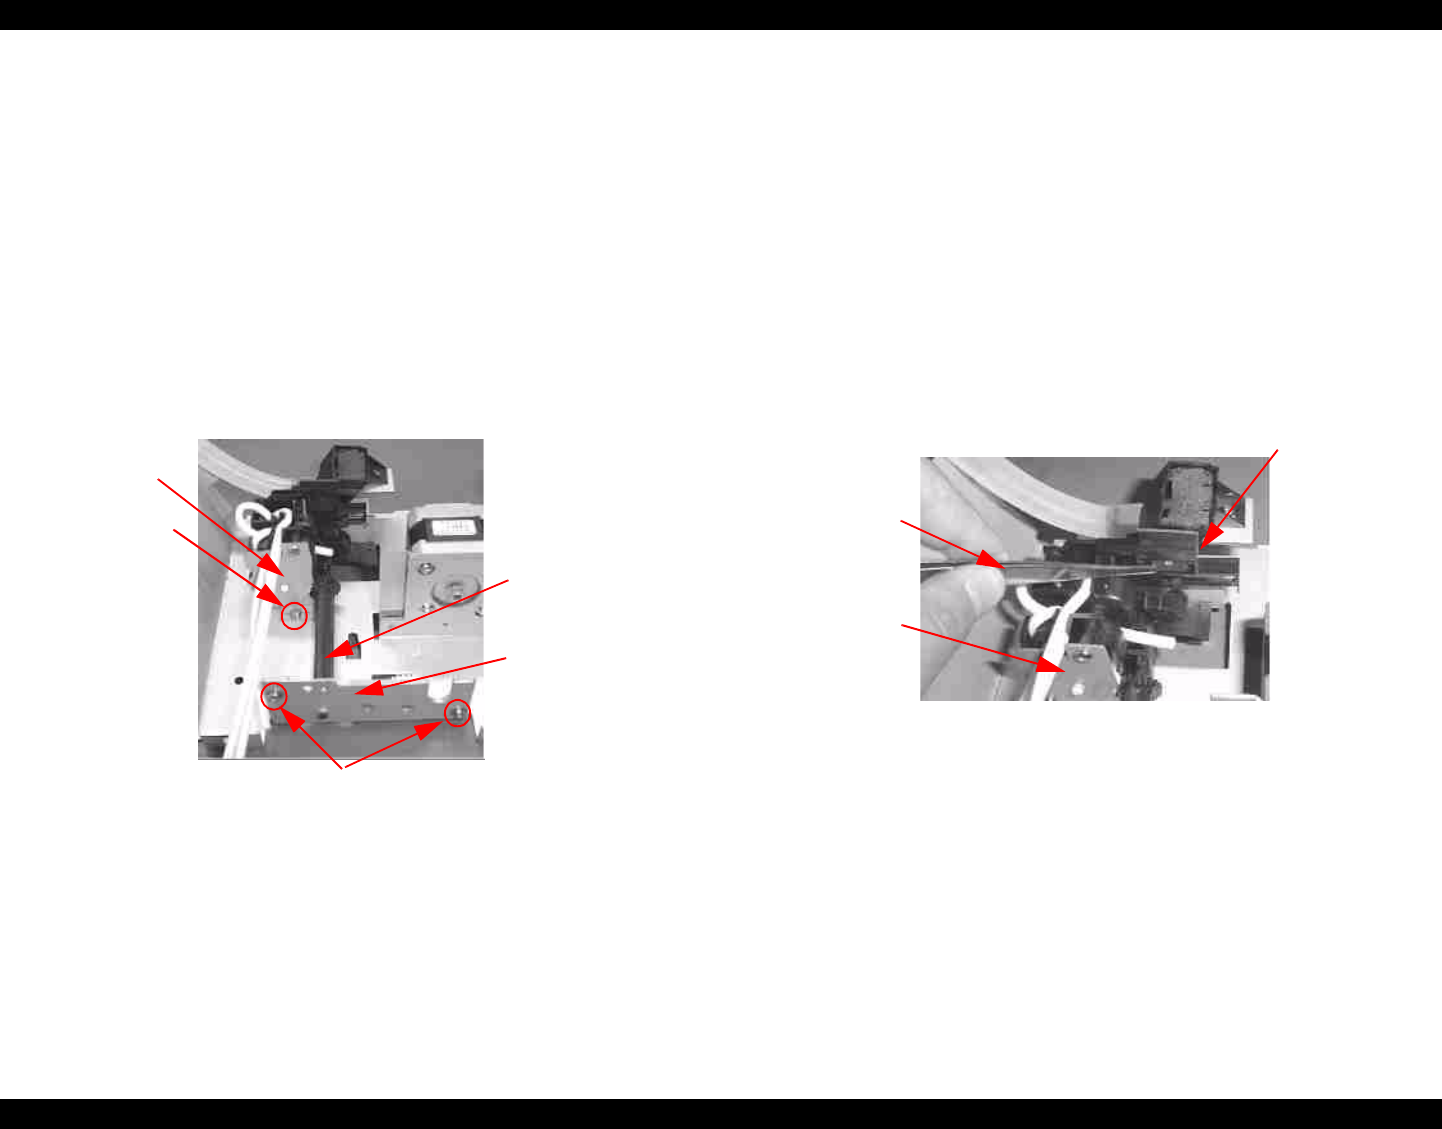
3. Remove the two (CUPS M3x6) screws securing the pump reduction gear
bracket and remove the pump reduction gear bracket and pump gear.
NOTE: When mounting the pump reduction gear, make sure the
reduction gear mesh with the corresponding gear.
4. Remove the one (CUPS M3x6) screw securing the Pump Assembly and
remove the Pump Assembly.
Figure 4-73. Removing the Pump Assembly
4.2.3.17 Removing the Cleaner Head
1. Remove the Maintenance Assembly as described in “Removing the
Maintenance Assembly” on page 143.
2. Remove the Cap Assembly as described in “Removing the Cap
Assembly” on page 147.
3. Using tweezers, release the joint for the concave part of the Cleaner Head
and the convex part of the Cleaner Head support part in the Pump Assy.
Then remove the Cleaner Head by pulling it upward.
NOTE: Set the Cleaner Head in the correct direction, and do not touch
the Cleaner Head with your bare hands.
Figure 4-74. Removing the Cleaner Head
Pump
Reduction Gear
Bracket
Pump
Screw
(M3x6)
Pump Gear
Screws
(M3x6)
Cleaner Head
(Front part is
rubber)
Tweezers
Pump
Assembly


