EPSON Stylus Pro 7000 Revision B
Adjustment Mechanism Adjustment 200
COVER OPEN SENSOR ASSEMBLY
When removing/replacing the Cover Assembly or the Front Cover, verify the
sensor operation using the Self-Diagnostic mode as described below.
1. Press the following buttons and turn on the printer to enter the Self-
Diagnostics mode.
[Paper Feed ↓]
+
[Cut/Eject]
+
[Cleaning]
2. Press the SelecType or Item button until "Check: Test" appears in the LCD,
then press the Enter button to select the Test menu.
3. Press the SelecType or Item button until "Test: Sensor" appears in the
LCD, then press the Enter button to select the Test Item menu.
4. Press the SelecType or Item button until "Sen: Cover xxxx" appears.
5. Open and close the Front Cover, checking the LCD to make sure the
message changes depending on the Front Cover position.
6. If the correct message does not appear or any other message appears,
verify the Cover Sensor is installed correctly and check the operation
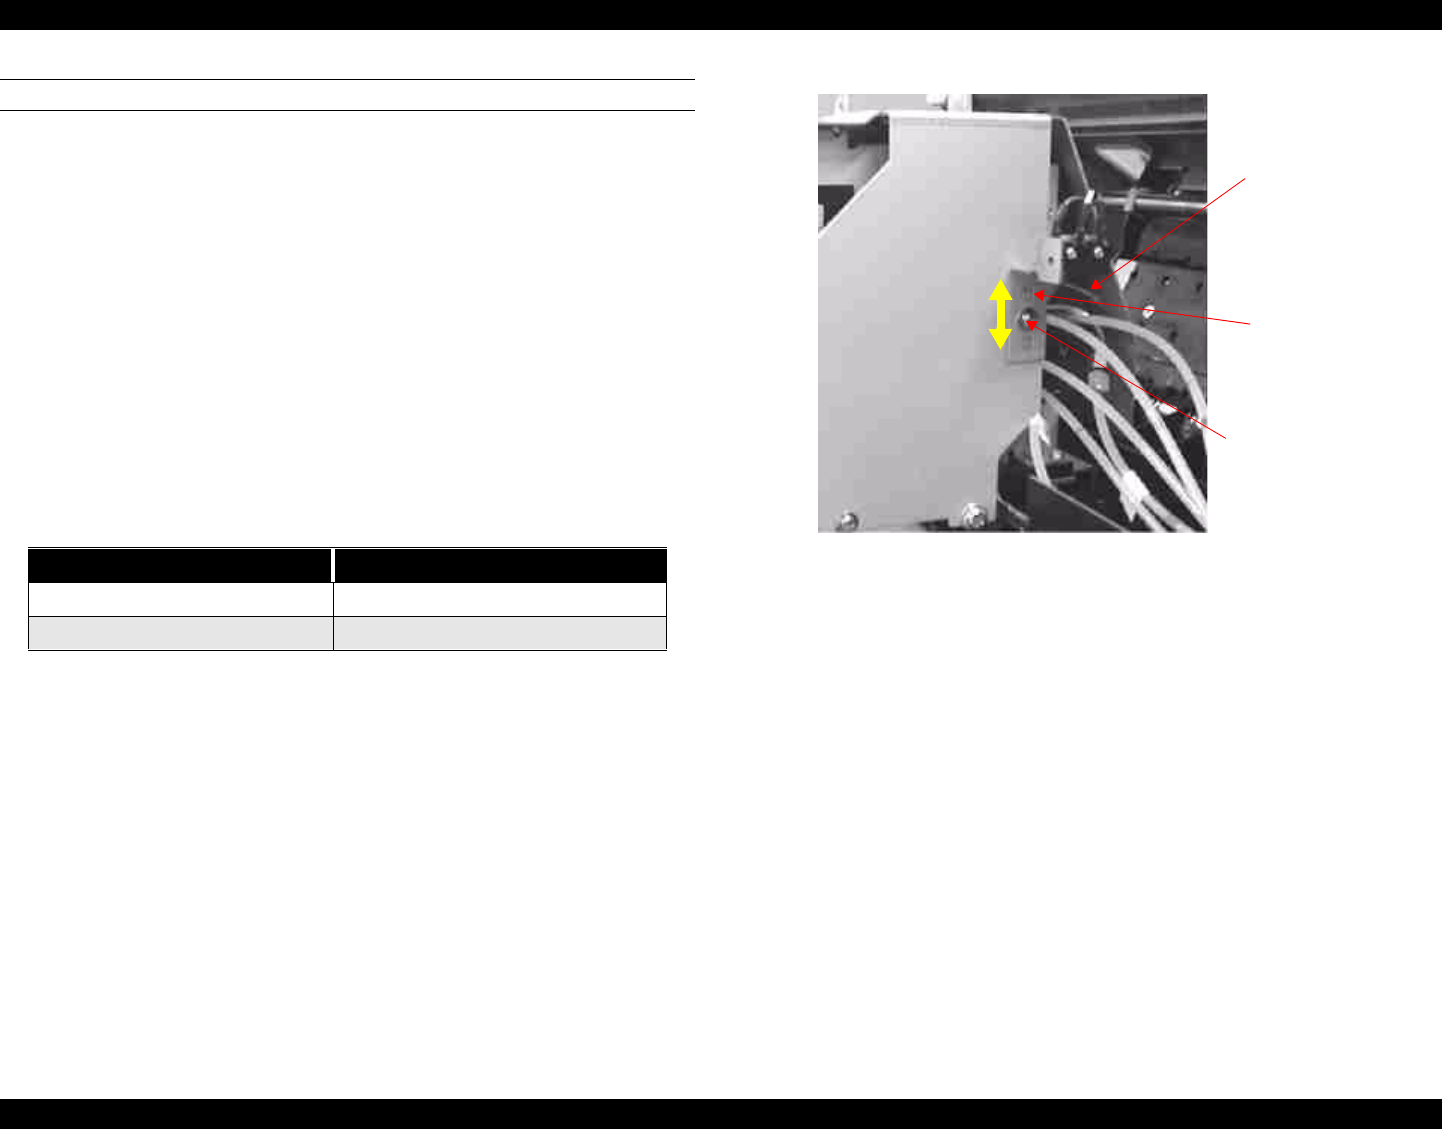
again. If necessary, loosen the screw securing the sensor and adjust the
position up or down until the cover open sensor operates correctly. Then
tighten the screw.
Figure 5-47. Interlock Switch Mechanism
Table 5-17. Cover Sensor Assembly Check
Front Cover LCD Message
Open Sen: Cover Open
Closed Sen: Cover Close
Flag
Cover switch
holder
Loosen this
screw to adjust
the sensor
position up or
down.
