EPSON Stylus Pro 7000 Revision B
Product Description SelecType Settings 46
1.6.6 Head Alignment Menu
The head alignment function allows you to perform the parallelism
adjustment. See the illustrations and table below for details.
To perform the parallelism adjustment:
1. Load A1-size roll paper.
2. Press the SelecType button and select the Head Alignment Menu. Then
press the Item button.
3. If using EPSON special media (paper thickness = 0.2~1.2mm), select
“STD”. If using other media, enter the paper thickness in 0.1mm
increments. (See “Detecting Paper Thickness” on page 44 if necessary.)
Press Enter.
4. Select the pattern #1~12 or patterns “ALL” that you want to print. See the
table below for details. Press the Enter button to print the test patterns.
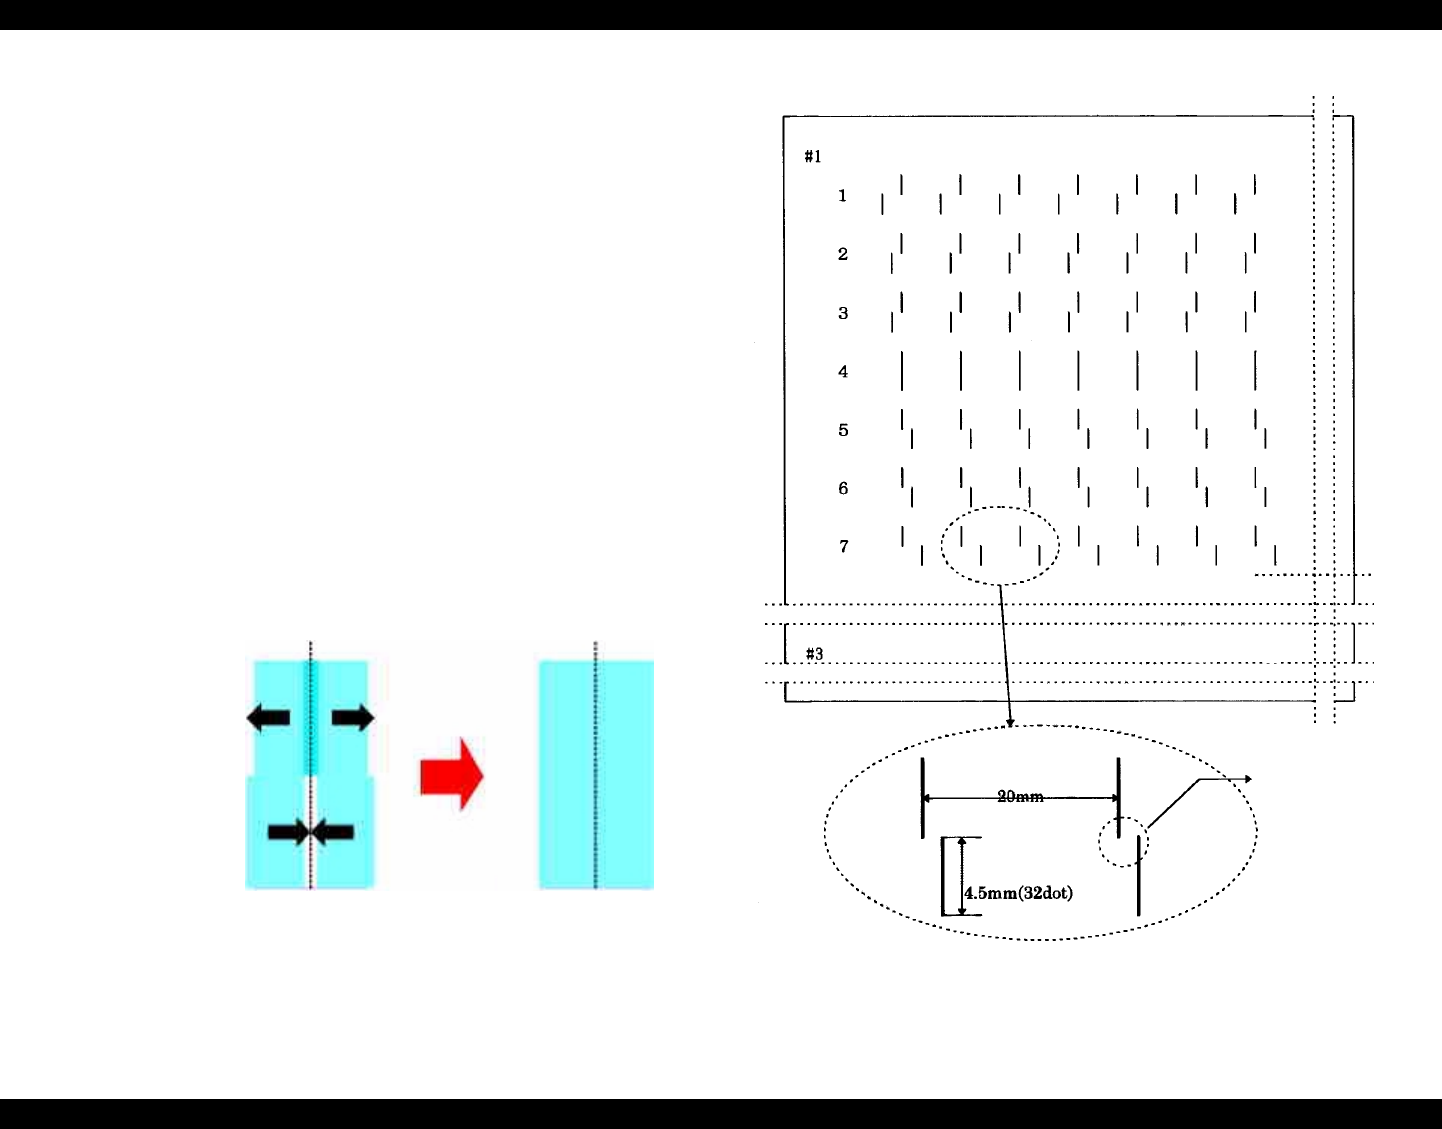
5. There are twelve sections in the printout, and for each section determine
which pattern is vertically aligned and enter the corresponding value
(1~7). You will notice in the printout that sections six through eight are a
little different than the others.
Figure 1-8. Head Alignment sections
The adjustment values for head parallelism are stored in NVRAM.
Figure 1-9. Head alignment printout
Incorrect
Correct
Effective Buttons
Item = next
Enter = select
PF +/- = change
This is too far
apart. In this
example, #4 is
the correct
pattern.


