EPSON Stylus Pro 7000 Revision B
Adjustment Self-Diagnostic Mode Menus 179
ADJ X HEAD SLANT (B/C HEADS)
This function prints a check pattern (one-at-a-time for each head) to make
sure the printheads are installed straight up-and-down. Use the patterns to
determine whether one or both printheads need adjustment. To correct any
slant, use "Head Adjust Lever A" as described below.
1. Make sure "Adj: x Head Slant" appears in the LCD, and press the Enter
button. (x = B or C depending on the printhead) After the check pattern
prints, "x Slant Check End" (x = B or C head) appears in the LCD.
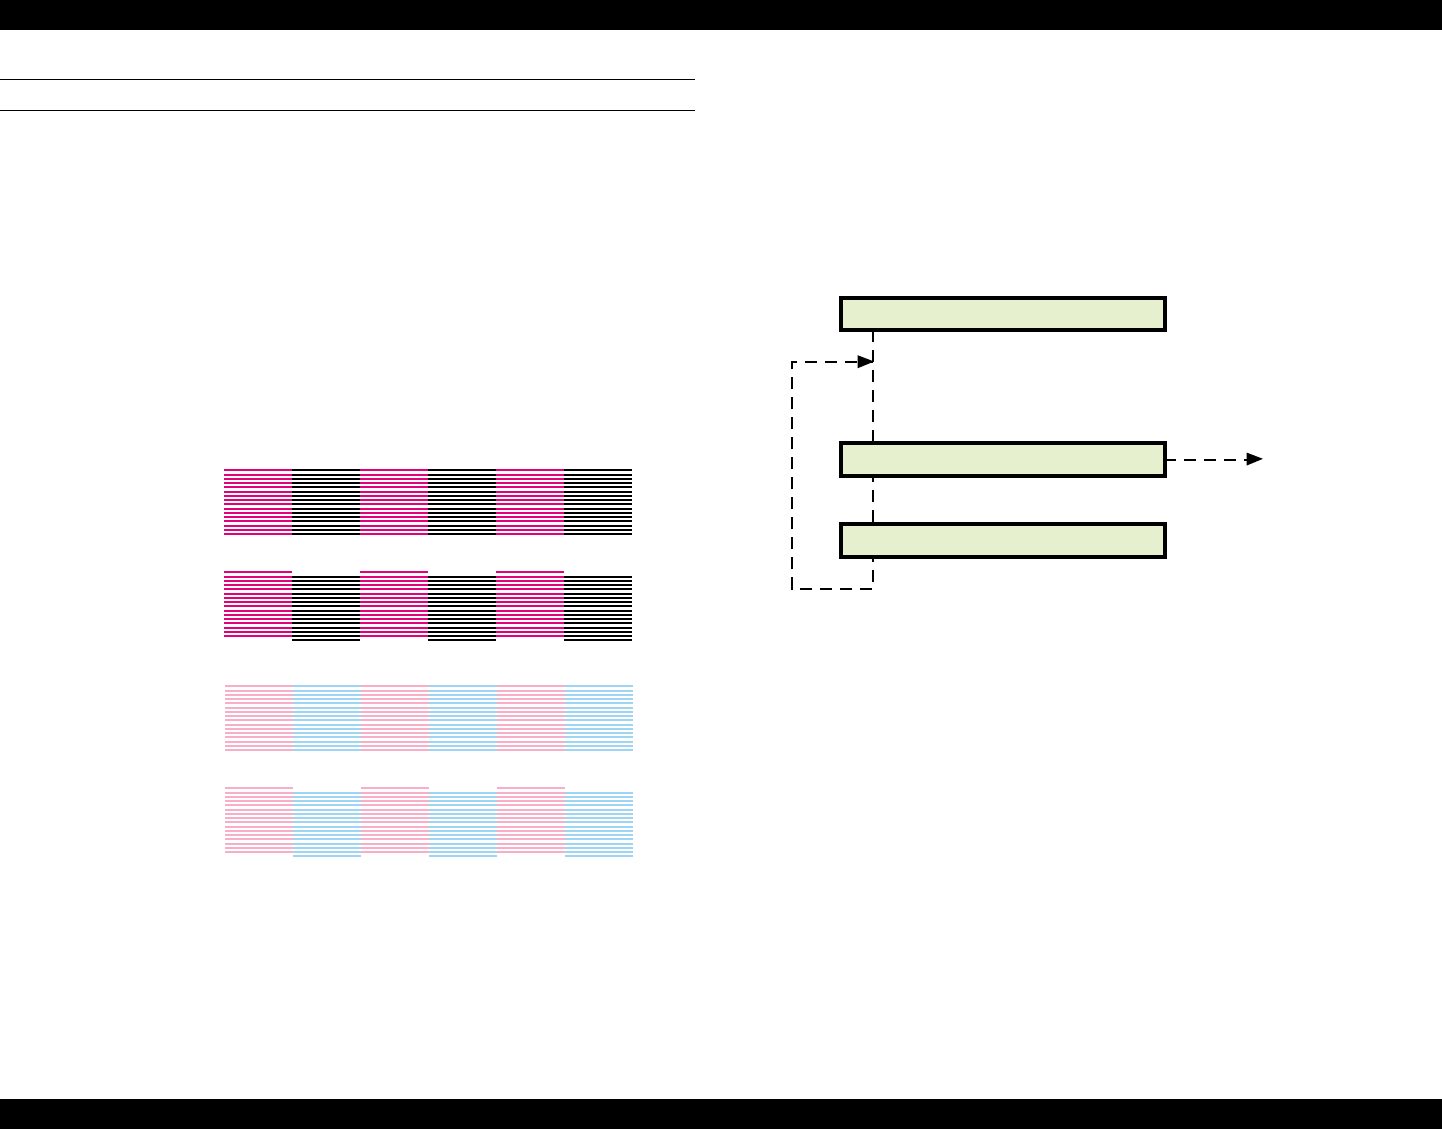
2. Compare the printed pattern with the illustration below. Press Enter if the
lines are parallel, as shown in the “OK” examples below. If there is a
slant, open the front cover, release the carriage lock by hand, and move
the carriage away from the carriage cap position.
Figure 5-19. Head Slant Check Printout
3. Loosen the screw securing the head that is printing at a slant, and move
the Head Adjust Lever A left or right depending on the slant direction. See
Figure 5-21 for reference.
4. Using tweezers, or a similar tool, push in the head toward the back of the
printer, and then tighten the screw.
5. After making sure both heads are correctly installed, move the carriage
back to the capping position by hand and close the front cover.
6. Select “Print Adj Pattern” with the SelecType or Item button, and print the
pattern again to make sure there is no slant. Adjust again if necessary. If
there is no slant, press Enter.
Figure 5-20. Head Slant Check Operation
OK
Bad
Magenta
Black
OK
Bad
Light
Magenta
Light
Cyan
B head check pattern
C head check pattern
Printing Pattern
Check the pattern for offset lines or
segments and change the adjust
lever position if necessary.
x Slant Check End
Print Adj. Pattern
[Enter]
[SelecType]/[Item]
Check other
head/end
adjustment
