


increment of your choice up to +2/–2 stops. (Choose between increments by setting
Custom Function CSM #b2.) In S mode, the aperture will change, while in A mode,
the shutter speed will change.
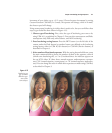
Using autoexposure bracketing is trickier than it needs to be, but you can follow these
steps to get results like those shown in Figure 4.15:
1. Choose type of bracketing. First, select the type of bracketing you want to do,
using CSM #e5, as explained in Chapter 9. You can select autoexposure and flash,
autoexposure only, flash only, white balance, and ADL bracketing.
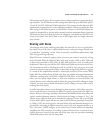
2. Press bracketing setting button. Press the BKT button (on the left side of the
camera under the Flash button) or another button you defined as the bracketing
setting button, either in CSM #f3 (Fn button) or CSM #f4 (Preview button), as
described in Chapter 9.
3. Select number of bracketed exposures. With the setting button held down, rotate
the main command dial to choose the number of shots in the sequence, either 0
(which turns bracketing off), or 2 or 3 bracketed shots. An indicator appears on
the top LCD: either 3F (three shots, normal exposure, underexposure, overexpo-
sure), +2F (normal exposure, overexposure), or –2F (normal exposure, underexpo-
sure). You can change the order in which these exposures are made using CSM #e6,
as described in Chapter 9.
Chapter 4 ■ Getting the Right Exposure 121
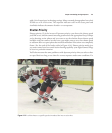
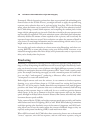
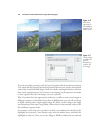
Figure 4.15
Bracketing can
give you three
different expo-
sures of the
same subject.