


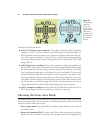

■ 3D-tracking. You select the focus point, and the camera will track your subject,
using any of the other focus points, as needed, when using AF-A and AF-C modes.
(In AF-S mode, focus tracking is not used, as focus is locked in when you press the
shutter release halfway.)
■ Auto-area AF. The D7000 chooses a focus point.
Other Settings
David Busch’s Nikon D7000 Guide to Digital SLR Photography36
This section describes some optional features you can select if you feel you need to choose
the white balance, change the camera’s sensitivity setting, or delay taking a picture with
the self-timer.
There are a few other settings you can make if you’re feeling ambitious, but don’t feel
ashamed if you postpone using these features until you’ve racked up a little more expe-
rience with your D7000.
Adjusting White Balance and ISO
If you like, you can custom-tailor your white balance (color balance) and ISO sensitiv-
ity settings. To start out, it’s best to set white balance (WB) to Auto, and ISO to ISO
200 for daylight photos, and ISO 400 for pictures in dimmer light. (Don’t be afraid of
ISO 1600 or even higher, however; the D7000 does a much better job of producing low-
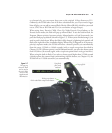
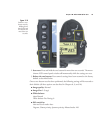
noise photos at higher ISOs than earlier generations.) You can adjust either one now by
pressing the WB (for white balance) or ISO buttons on the back of the camera to the
left of the LCD, and rotating the main command dial until the setting you want appears
on the status LCD on top of the camera.
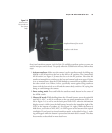
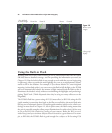
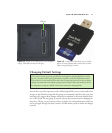
MAKING SETTINGS UNDER LOW LIGHT
When working under low light levels, you might experience some difficulty seeing the
white balance, ISO, or other settings on the top-panel monochrome LCD as you make
them. You can always rotate the ON-OFF switch an additional push in the clockwise
direction to illuminate the LCD backlight, but there is a better way. Instead, press the
Info button (at the bottom of the right side of the camera to the right of the LCD) to
show the much larger and easier-to-read shooting information display on the color LCD.
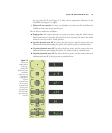
Then press the WB or ISO button (or the button for whatever setting you’re changing)
and rotate the appropriate dial until the value you want appears on the shooting informa-
tion display. Indeed, you can press the Info button at any time to pop up this informa-
tion screen, which is especially helpful when working with the camera on a tripod, or
under dim illumination.