


3. Activate capture mode. Release the WB button for a moment, then press and hold
it again until the PRE icon on the monochrome LCD begins a flashing cycle of
about six seconds.
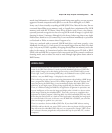
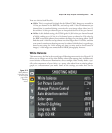
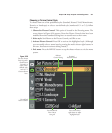
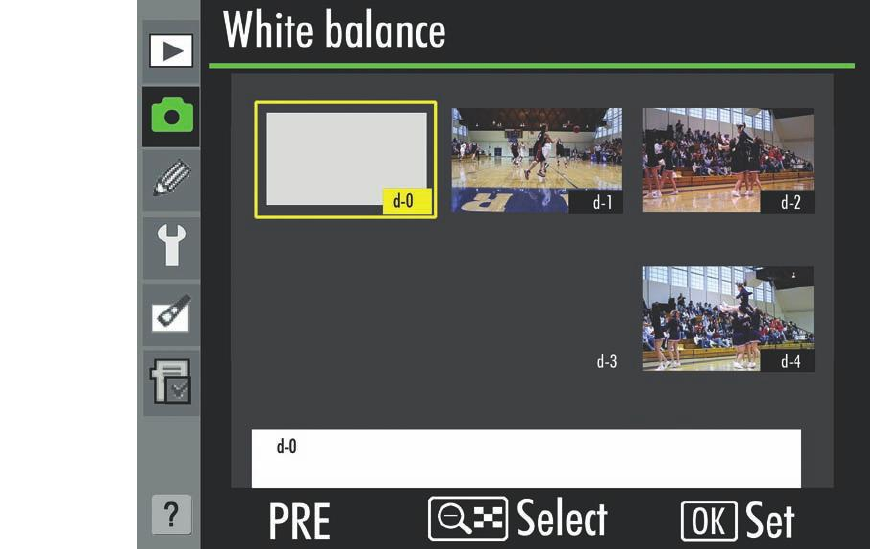
4. Capture white balance of reference. While the PRE icon is flashing, take a pic-
ture of the reference object. The white balance will be stored in a preset menu slot
numbered d-0, as shown in Figure 8.17.
5. Confirm successful capture of white balance. If the camera successfully measured
white balance, Good will flash on the monochrome LCD for about six seconds,
and Gd will appear in the bottom line of the viewfinder. Otherwise, you’ll see no
Gd on the LCD and viewfinder. White balance measurement can fail when the ref-
erence object is too brightly or poorly illuminated. In that case, repeat steps 2-5
until the measurement is successful.
6. Use captured white balance. You can immediately begin taking pictures using the
captured white balance, until you hold down the WB button again and switch to
one of the other white balance settings, such as Tungsten, or Fluorescent. The next
time you switch to Pre, the white balance you just captured will be used again,
unless you manually switch to one of the other captured settings, which are stored
in “slots” labeled d-1 to d-4, as described next.
Chapter 8 ■ Setup: Playback and Shooting Menus 247
Figure 8.17
When you cap-
ture a scene’s
white balance,
it will be stored
in slot d-0.