


The histogram can also be used to aid in fixing the contrast of an image, although gaug-
ing incorrect contrast is more difficult. For example, if the histogram shows all the tones
bunched up in one place in the image, the photo will be low in contrast. If the tones
are spread out more or less evenly, the image is probably high in contrast. In either case,
your best bet may be to switch to RAW (if you’re not already using that format) so you
can adjust contrast in post processing. However, you can also change to a user-defined
Picture Control with contrast set lower (–3 to -3) or higher (+1 to +3) as required. You’ll
find instructions for creating Picture Controls in Chapter 8.
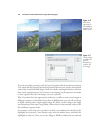
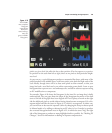
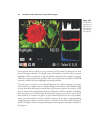
One useful, but often overlooked tool in evaluating histograms is the Highlights dis-
play, which shows blown out highlights with a black blinking border for the selected
active channel. Highlights can give you a better picture of what information is being
lost to overexposure. By default, the Highlights display shows “blinkies” for the lumi-
nance channel, but you can separately view highlights for the red, green, and blue chan-
nels. Just follow these steps:
1. With an image displayed, and the highlights/histogram screen shown, hold down
the Thumbnail/Zoom In button.
2. Press the multi selector left/right buttons to cycle among RGB (all channels), R, G,
and B.
3. When a channel is framed in an orange outline, the highlight information for that
channel is shown in the thumbnail image in the upper-left corner. At the bottom
left of the screen, either RGB, R, G, or B will be highlighted to show the currently
active channel.
David Busch’s Nikon D7000 Guide to Digital SLR Photography130
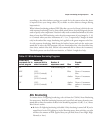
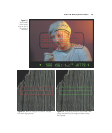
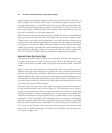
Figure 4.20 This histogram shows
an underexposed image.
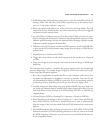
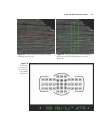
Figure 4.22 A histogram for a
properly exposed image should look
like this.
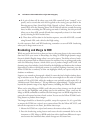
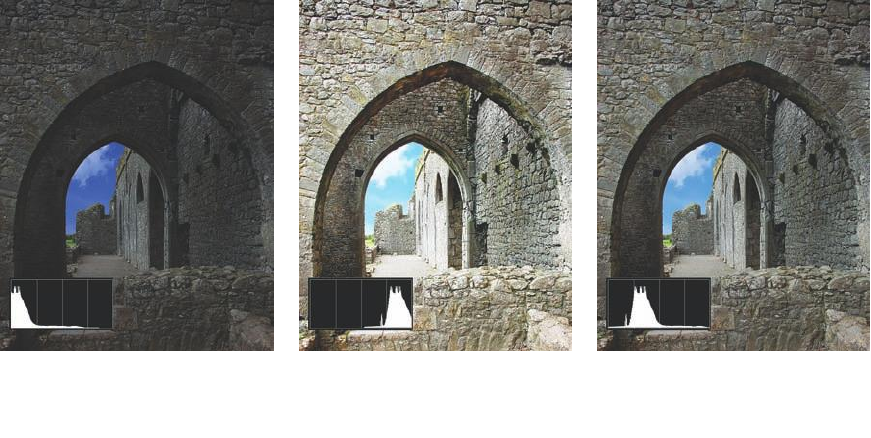
Figure 4.21 This histogram reveals
that the image is overexposed.