


5-29
Cisco IOS Software Configuration Guide for Cisco Aironet Access Points
OL-30644-01
Chapter 5 Administrating the Access Point
Managing the System Time and Date
Optional ARP Caching
When a non-Cisco client device is associated to an access point and is not passing data, the wireless
device might not know the client IP address. If this situation occurs frequently on your wireless LAN,
you can enable optional ARP caching. When ARP caching is optional, the wireless device responds on
behalf of clients with IP addresses known to the wireless device but forwards out its radio port any ARP
requests addressed to unknown clients. When the wireless device learns the IP addresses for all
associated clients, it drops ARP requests not directed to its associated clients.
Configuring ARP Caching
Beginning in privileged EXEC mode, follow these steps to configure the wireless device to maintain an
ARP cache for associated clients:
This example shows how to configure ARP caching on an access point:
AP# configure terminal
AP(config)# dot11 arp-cache
AP(config)# end
Managing the System Time and Date
You can manage the system time and date on the wireless device automatically, using the Simple
Network Time Protocol (SNTP), or manually, by setting the time and date on the wireless device.
Note For complete syntax and usage information for the commands used in this section, refer to the Cisco IOS
Configuration Fundamentals Command Reference for Release 12.3.
This section contains this configuration information:
• Understanding Simple Network Time Protocol, page 5-30
• Configuring SNTP, page 5-30
• Configuring Time and Date Manually, page 5-30
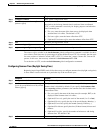
Command Purpose
Step 1
configure terminal Enter global configuration mode.
Step 2
dot11 arp-cache [ optional ] Enable ARP caching on the wireless device.
• (Optional) Use the optional keyword to enable ARP caching only for
the client devices whose IP addresses are known to the wireless
device.
Step 3
end Return to privileged EXEC mode.
Step 4
show running-config Verify your entries.
Step 5
copy running-config startup-config (Optional) Save your entries in the configuration file.