


2-5
Cisco IOS Software Configuration Guide for Cisco Aironet Access Points
OL-30644-01
Chapter 2 Using the Web-Browser Interface
Enabling HTTPS for Secure Browsing
Enabling HTTPS for Secure Browsing
You can protect the communication with the access point web-browser interface by enabling HTTPS.
HTTPS protects HTTP browser sessions by using the Secure Socket Layer (SSL) protocol.
Note When you enable HTTPS, your browser might lose its connection to the access point. If you lose the
connection, change the URL in your browser address line from http://ip_address to https://ip_address
and log into the access point again.
Note When you enable HTTPS, most browsers prompt you for approval each time you browse to a device that
does not have a fully qualified domain name (FQDN). To avoid the approval prompts, create an FQDN
for the access point as detailed in the following procedure.
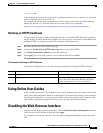
Follow these steps to create an FQDN and enable HTTPS:
Step 1 If your browser uses popup-blocking software, disable the popup-blocking feature.
Step 2 Choose Easy Setup > Network Configuration.
The Network Configuration page appears.
Step 3 Enter a name for the access point in the Host Name field, and then click Apply.
Step 4 Choose Services > DNS page.
The Services: DNS - Domain Name Service page appears.
Step 5 In the Domain Name System (DNS) field, click the Enable radio button.
Step 6 In the Domain Name field, enter your company’s domain name.
Step 7 Enter at least one IP address for your DNS server in the Name Server IPv4/IPv6 Addresses fields.
Step 8 Click Apply.
The access point FQDN is a combination of the system name and the domain name. For example, if your
system name is ap3600 and your domain name is company.com, the FQDN is ap3600.company.com.
Step 9 Enter the FQDN on your DNS server.
Tip If you do not have a DNS server, you can register the access point FQDN with a dynamic DNS service.
Search the Internet for dynamic DNS to find a fee-based DNS service.
Step 10 Choose Services > HTTP.
The Services: HTTP - Web Server page is displayed.
Step 11 In the Web-based Configuration Management field, select the Enable Secure (HTTPS) Browsing
check box.