


Teledyne API - T100 UV Fluorescence SO2 Analyzer SETUP Menu
119
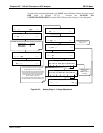
To make these manual adjustments, the AOUT auto-calibration feature must be turned
OFF (refer to Section 5.9.3.2). Activate the ANALOG I/O
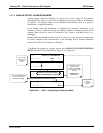
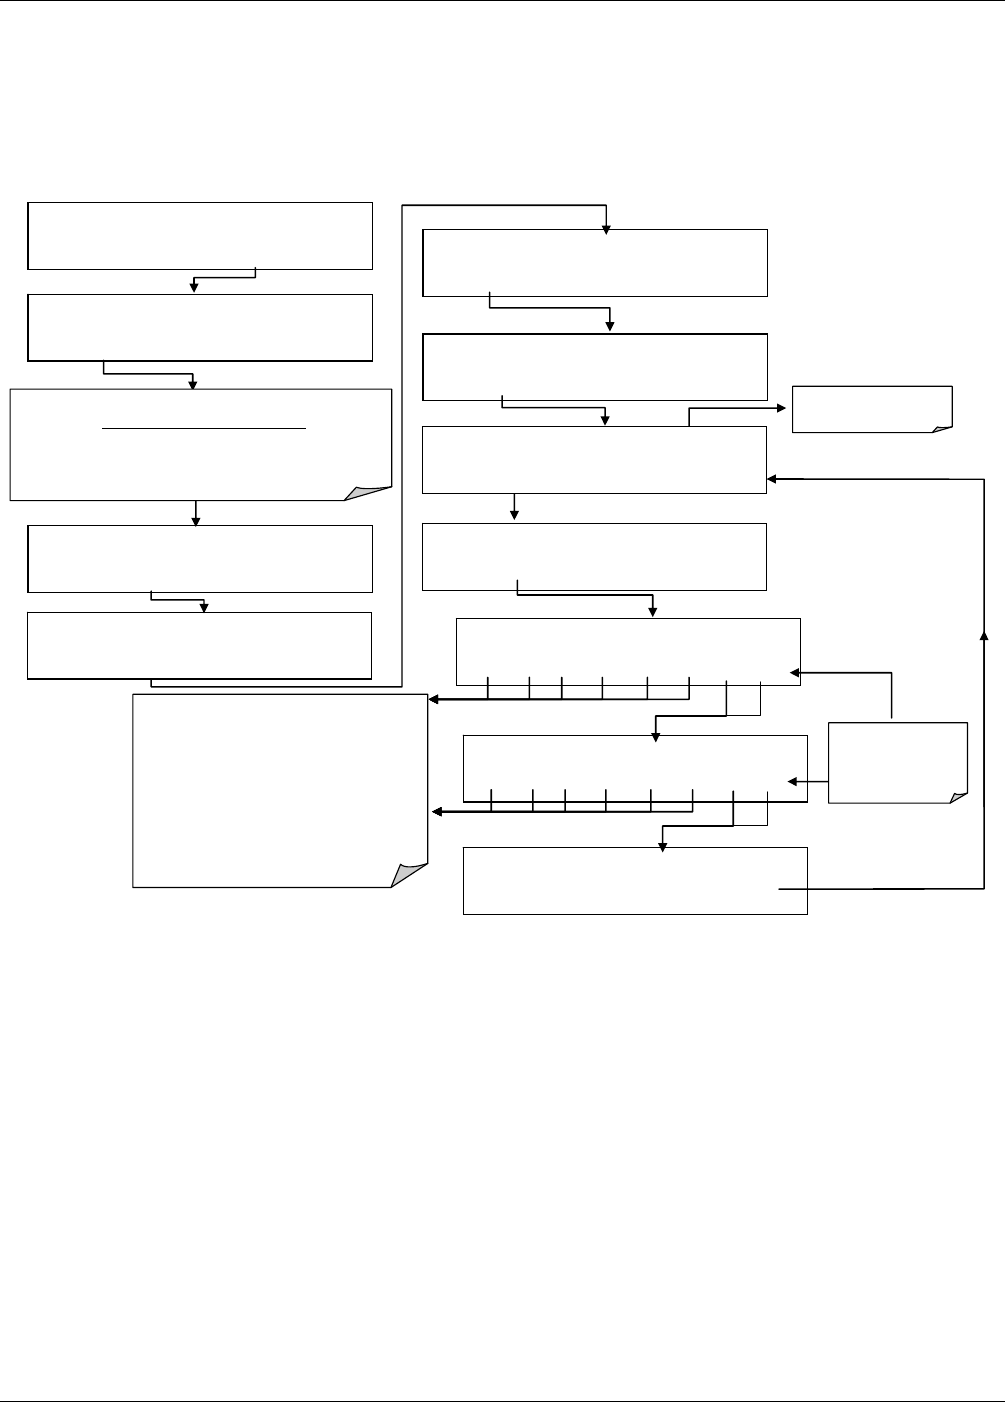
CONF
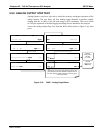
IGURATION MENU from the DIAG Menu (refer to Figure 5-16), then press:
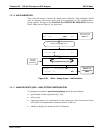
DIAG ANALOG I / O CONFIGURATION
PREV NEXT ENTR EXIT
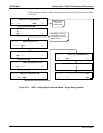
DIAG AIO AOUTS CALIBRATED: NO
< SET SET> CAL EXIT
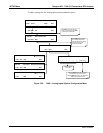
DIAG AIO CONC_OUT_1 :5V, NO CAL
< SET SET> EDIT EXIT
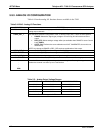
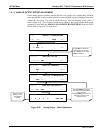
DIAG AIO CONC_OUT_1 CALIBRATED: YES
< SET CAL EXIT
DIAG AIO CONC_OUT_1 OVERRANGE: ON
SET> EDIT EXIT
DIAG AIO CONC_OUT_1 CALIBRATED: NO
< SET CAL EXIT
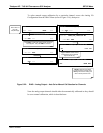
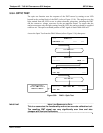
DIAG AIO CONC_OUT_1 VOLT
–
Z : 0 mV
U100 UP10 UP DOWN DN10 D100 ENTR EXIT
These control buttons increase / decrease the
analog output by 100, 10 or 1 counts.
Continue adjustments until the voltage measured
at the output of the analyzer and/or the input of
the recording device matches the value in the
upper right hand corner of the display to the
tolerance listed in Table 6-10.
The concentration display will not change. Only
the voltage reading of your voltmeter will change.
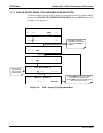
DIAG AIO CONC_OUT_1 VOLT
–
S : 4500 mV
U100 UP10 UP DOWN DN10 D100 ENTR EXIT
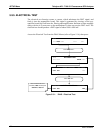
DIAG AIO CONC_OUT_1 REC OFS: 0 mV
< SET SET> EDIT EXIT
If AutoCal is ON, go to
Section 6.7.3
EXIT ignores the
new setting.
ENTR accepts the
new setting.
DIAG AIO CONC_OUT_1 AUTO CAL: OFF
< SET SET> EDIT EXIT
DIAG AIO CONC_OUT_1 RANGE: 5V
SET> EDIT EXIT
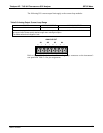
Press SET> to select the analog output channel to be configured:
DISPLAYED AS = CHANNEL
CONC_OUT_1 = A1
CONC_OUT_2 = A2
TEST OUTPUT = A4
Figure 5-24: Analog Output – Voltage Adjustment
06807C DCN6650