


DEFINITY Enterprise Communications Server Release 6
Installation and Test for Multi-Carrier Cabinets
555-230-112
Issue 5
May 1998
Cable Ductwork
Page C-12
C
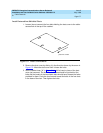
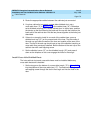
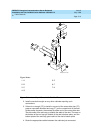
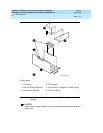
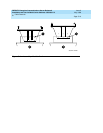
Mating Shielded Ducts to Risers
The new shielded ductwork is constructed so new cross-aisle troughs can be
attached to risers of the former design. They fit outside of the older risers.
To attach the new shielded trough to a riser, first set it under the trough on the
riser and install the other side of the trough as already described. Lift the trough
as shown in Figure C-7
, with the walls of the trough outside of the walls of the
riser. Hold a nut under the trough, and bolt the parts together as shown.
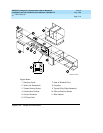
Figure C-7. Shielded Duct Connected to Old Style Riser
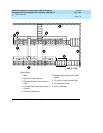
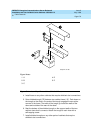
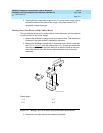
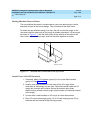
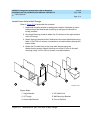
Install Cross Aisle I/O Ductwork
1. If required, attach I/O endplate (group 6) to the cross-aisle brackets
(group 10). See Figure C-8
.
2. Install a cross-aisle bracket on both sides of the I/O trough where
cross-aisle or wall trough is to be used. Place the bracket inside the I/O
trough with its angle end outside. Secure the bracket using three
thread-forming screws in each trough (use the holes in the bracket closest
to the angle).
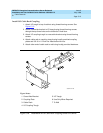
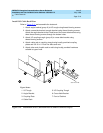
3. If cross-aisle, install brackets on I/O trough of cross-aisle cabinet.
4. Place I/O cross-aisle trough (group 10) or I/O wall trough (group 26) on
brackets and secure with thread-forming screws.
newduct KLC 071696