Procedure
Step 1
In the Navigation pane, click the Equipment tab.
Step 2
On the Equipment tab, click the Equipment node.
Step 3
In the Work pane, click the Policies tab.
Step 4
Click the Power Groups subtab.
Step 5
On the icon bar to the right of the table, click +.
If the + icon is disabled, click an entry in the table to enable it.
Step 6
On the first page of the Create Power Group wizard, complete the following fields:
a) Enter a unique name and description for the power group.
This name can be between 1 and 16 alphanumeric characters. You cannot use spaces or any special
characters other than - (hyphen), _ (underscore), : (colon), and . (period), and you cannot change this name
after the object has been saved.
b) Click Next.
Step 7
On the Add Chassis Members page of the Create Power Group wizard, do the following:
a) In the Chassis table, choose one or more chassis to include in the power group.
b) Click the >> button to add the chassis to the Selected Chassis table that displays all chassis included in
the power group.
You can use the << button to remove one or more chassis from the power group.
c) Click Next.
Step 8
On the Power Group Attributes page of the Create Power Group wizard, do the following:
a) Complete the following fields:
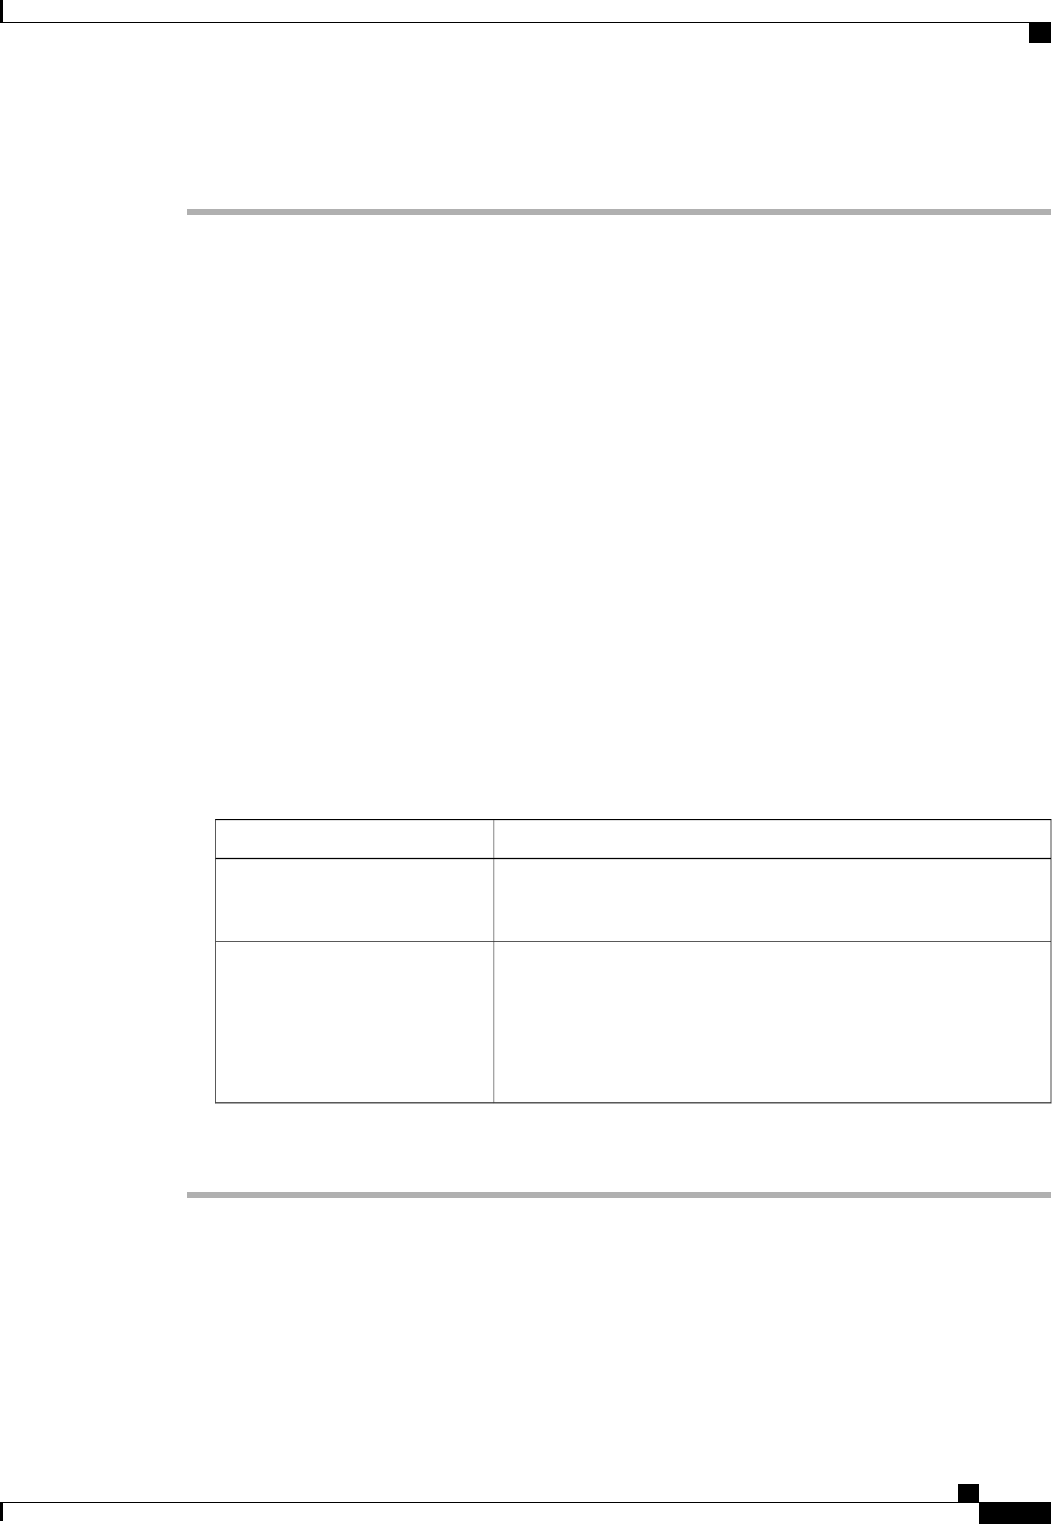
DescriptionName
The maximum peak power (in watts) available to the power group.
Enter an integer between 0 and 10000000.
Power Cap field
This can be one of the following:
• Chassis—Cisco UCS monitors power usage and changes the
blade allocations as required to maximize power utilization.
• None—Blade allocations are not adjusted dynamically.
Enable Dynamic Reallocation
field
b) Click Finish.
Cisco UCS Manager GUI Configuration Guide, Release 2.0
OL-25712-04 567
Configuring Policy-Driven Chassis Group Power Capping


